New Saraiki Song 2019 latest || Sada Dhola Kch H Tan || Latest Saraiki Songs 2019 ||Latest Songs
New Saraiki Song 2019 latest || Sada Dhola Kch H Tan || Latest Saraiki Songs 2019 ||Latest Songs
-------------------------------------------
Holiday Profile - Duration: 4:07.
It's time to do a little police work
[music]
Come on in welcome to my home
You might be thinking what does police work have
to do with the holiday video?
Easy maybe you should come up with a profile for
the person who you are buying gifts for.
Yeah, here's the thing
If you were to come up with a page which you had a list of you know the person's name and then
things that they liked things that you've gotten them things that they've
gotten so that way when it came time to buying them some sort of present you
have some idea
You can actually go looking and see what things they use all
the time, what things they buy all the time.
You can actually find out what size they actually wear.
Then, guess what, write these things down
Don't drive yourself crazy with us later on.
Because if you don't write it down you will forget it
and as it changes updated
Having a profile on somebody who you really care
about you want to buy things that you know that they will enjoy really does help you.
If your person doesn't like chocolate, You should probably write that down
so you're not buying chocolate.
They don't like flowers
write that down if
they love the color blue light that down
I mean you want to know everything you
possibly can about your person the person who love.
This can be a spouse
boyfriend/girlfriend, family members, kids
But have all these things down that way
you know what their interests are that way when it comes time to buy them
something, or to get them something, or, you have some sort of idea something to go off of
And it can be little things just things that you remember throughout
the day simply because having a profile of this person is a really good way so
that you that way you have some idea
Now you're saying but profiling is bad well
you know when it comes to really getting somebody something that you think that
the like and remembering it because I've done that I have gone honestly I've done that
Where I thought well this person would really like this thing I'll remember it.
And then it comes time to buy a gift for the person and I'm like:
[questing noise]
I don't know.
I thought I had an idea
No.
And that way you also are going to start keeping
track of things, you are going to start noticing things
If you notice things like: Oh they
wore a lot of pink one time. Maybe pink is a good color for them, or if they flat
out say "I hate the color pink!"
This gives you some clue
and you will start noticing little things.
You will start having fun with this. you will mean it really will
help you out later on in life because you'll be able to say
"hey I know that your favorite drink is this."
"Oh yeah it is." Well yeah because I've written it
down and once you write something down,
You can remember it a little bit easier.
Trust me on this one
This will help you with some of your gift-giving ideas.
This will help you with some of your holidays.
This will keep you from going down that
road of, "I have no idea what to get you."
Just by paying attention a little bit
more and then also not just paying attention for writing it down so that
way you remember it
Because you remembering it's going to be really important.
Well what do you think about that?
Is doing a holiday profile a good idea?
Is it a bad idea? let me know down in the comments
If you have ideas or
suggestions let me also know those down in the comments.
Because these holiday
things are coming up and we've got a big one coming up with Valentine's Day
coming up soon
and you might want to know some things if you have some
information about that person it might make your Valentine's Day just a little
bit better
So let me know what you think about listen I hope I get to see you
again next time
If you like this video give it a thumbs up you can share it
don't forget to subscribe and check out the other videos on this channel I love
making these videos for you and I hope I get to see you again next time
[ Music ]
-------------------------------------------
Mercedes-Benz A-Klasse 180 CDI AMG STYLE Edition H.LEER, Navi, Xenon , LMV - Duration: 1:23. For more infomation >> Mercedes-Benz A-Klasse 180 CDI AMG STYLE Edition H.LEER, Navi, Xenon , LMV - Duration: 1:23.
 -------------------------------------------
Comment configuré la Suunto Ambit? / Mon guide complet - Duration: 27:53.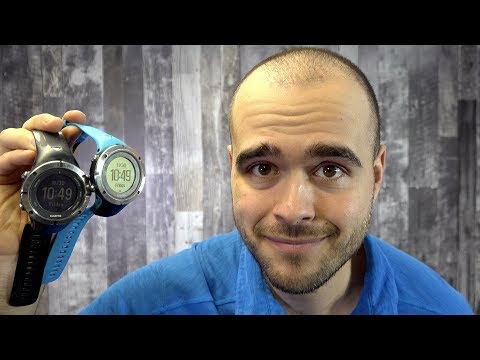
Today, we will see in depth how works the Suunto Ambit.
Hello, I'm Pascal, and welcome to this 14th training capsule, to help you on your next trip.
Today I come back with a complete training capsule on my favorite watch, the Suunto Ambit,
because after presenting it in the first capsule, I had some
requests concerning some of its functions.
On the previous capsule I was selling especially what the watch could do,
but today we will see in depth how to operated it.
Just before, if you still hesitate between a Ambit and a Spartan, I always have the impression
that Ambit has absolutely nothing to envy to the new watch.
I still see a lot of comments from people who have been using Suunto for a long time
who are disappointed with the new model.
I personally tried it in a sport shop and I was not really impressed.
It was lighter that make seemed a lot less robust.
But maybe it's just an impression.
On the other hand, Ambit is a very reliable, trusty and resistant to EVERYTHING.
Today, I'm doing the demo with an Ambit 3 peak.
This is the biggest model of Ambit currently, some options might not be
available on older models or more affordable ones.
Basically, we have a simple watch that tells us the date, the time, and the day of the week that we are.
The screen is usually divided into three.
The top and middle indicates a fixed information, while the lower one can be swapped
from one option to another using the view button.
We can see the seconds, the secondary time, to know the time at home when traveling.
This arrow is a follow-up of the atmospheric pressure.
Each band represents three hours.
If the arrow is straight, like now, the pressure is stable, if it rises, the pressure rises.
But what is that for?
Generally, atmospheric pressure drop before a storm.
So if you see an arrow pointing down, this may not be the best time
to go out to do an outdoor activity.
Let's continue, the next option let us see the battery percentage,
a pedometer, then we go back to the days of the week.
We can also hold this button to invert the colors of the screen.
If you prefer to have a black background, and a white writing ...
Or gray.
The light / lock button as its name suggests, the backlight
with a single press, and the lock of buttons when held.
That way we can not mess things up if we touch a button.
I never use it personally.
The '' Next '' button is used to change pages.
Here we can see at the top the current altitude, while the chart below let us
see our move of the last 12 hours.
The last 12 hours, I was at home, that's why it did not really move.
Below, the hour at which the sun will set tonight, and will rise tomorrow morning, alternately.
If you continue to scroll with the button view, we can see the atmospheric pressure
in hectopascal, the barometer is just at the back of the watch here.
Then we find the current time, the temperature, which is usually
higher than the actual temperature because it is warmed by our body heat,
then we go back to sunset and sunrise.
On the next page, it's a compass.
We can see here to the degree in which orientation we look at.
This is the line at the top of the watch that designate the degree we points.
The black arrow indicates the North.
But as we do not always want to go to North, you can press the backlap button
to display a second arrow that will point a a target.
The watch indicates Magnetic North, as any compass.
However, as this watch is very special, it can be calibrated by holding the view button.
Down to declination, we can indicate the current declination of where we are.
But how do you know that?
http://www.magnetic-declination.com/
By going on that site, you will be instantly geolocated.
And here is the declination in my city.
We can leave this menu by pressing several times on back.
On the next page, there is a stopwatch.
Just press the 'start' button to start counting
You can also press the '' lap '' button to count lap.
So the first line counts the laps, the second the time elapsed since the beginning
of activity and the last one is the elapsed time since the beginning of this lap.
At the end we press stop and we can do a follow-up of all the laps by pressing '' lap ''.
To reset it to 0, it is only hold '' start stop ''.
On the next page, we find the opposite stopwatch, a countdown.
With a simple tap on view, you can adjust the time from 99 hours and 59 minutes to one minute.
The last page is the activity log.
The watch shows in the bottom how it juge us today, as well as the number
of calories burned since the beginning of the day.
You're really beautiful today, your smile is much brighter since you burned this 830 Calorie.
- Thank you Suunto!
No, it will not tell you if it finds you well dress or if you smell good, I mean
that she will judge you on your physical activities.
You can change the graph with the view button.
Here we can see the number of average calories burned daily, for the last seven days.
The recovery time is the number of hours that the watch judges that we needs to
recover from last activities.
According to Suunto, the longest hours that we can move on to recover from a
activity is 120h, wich is five days.
Well we have see all of the basics of the watch.
Now let's look at the configuration and calibration of the watch.
We talked earlier about altitude, as on this graph.
The watch estimates the altitude from the atmospheric pressure.
As it decreases while climbing, the watch is able to display in real time the altitude
thanks to the barometer at the back of the watch.
However, as the atmospheric pressure varies from day to day, you have to know that
the result can be falsified if it is not not regularly calibrated.
To do so, simply go to the options of the watch by holding the button '' next ''.
We navigate in this menu using the buttons up and down, and we select with next,
and come back to the previous page using the back button.
So we go to alti-baro, and go down to reference.
The watch can adjust automatically thanks to this option by relying on the satellite,
but you must be outside to do it.
Personally, I recommend to calibrate first the barometer.
To know the pressure of your location, simply type atmospheric pressure and
the name of your city on google.
You should find the info quickly enough.
I calibrate the barometer once a year.
Finally you must calibrate the altimeter.
For that I use whatismyelevation.com
Input your zip code ... And there you are.
Now memorize the displayed number, and do the calibration at home, once a month.
If we go back of two pages, in the alti-baro menu, we can activate the '' storm-alarm '' option,
or storm alert.
I was saying earlier that a drastic atmospheric pressure drop was a sign of an incoming storm ...
Well the watch will warn you with an audible signal if the pressure drops
of at least 4 hectopascal in a period three hours.
I tested it several times, it never fails to warn a rain, but it also makes false alarms, especially in winter.
It's an interesting option, but it might be really unpleasant at night.
There should be an option to disable the function in a time slot.
I just made the request to the Suunto team, only time will tell us what they will do with it.
Let's move on to serious things now.
When you buy such a watch, it's to do sports activities.
Now let's see how to configure them.
It can be done from the smartphone app, or from the web page on a computer.
Today I'll show it to you from of the web page because in my opinion it is
much better developed than the application for phone.
You have to go to the movescount.com web page.
If you are not already a member, become it, it's free and ...
Not optional.
On this page we can see from day to day my activity and yes ...
I can not hide anything, it happens to me me too to be sedentary ...
Especially after my big travels.
A little further down we can see it as a list.
By clicking on an activity, you can see a lot of information.
The distance traveled, the average speed and maximum.
The number of meters climbed and descended.
Time spent ascending, descending and on the flat, the highest point as the
lowest, the average temperature, the coldest and the hottest.
The map with the GPS plot can be displayed in plan or satellite mode.
We also changed maps if we prefer Mapbox rather than Google map.
I like to watch the heatmap to see the most popular places.
It's a kind of compilation of all Suunto product owners.
Below we find the same information in graph form.
For example, we can compare the altitude with the temperature, while seeing the point move on the map.
When I travel, I do not use the heart belt.
If we take another activity, it can be more interesting to compare speed with
the heart rate or even the number of breaths per minute.
But I got lost, we wanted to see how to configure it.
So for that, we have to go to our profile picture and click on watches.
In my case I have two watches so I am request to select which one I want to configure.
My settings will only be changed for the one I select.
So here they are, the famous activity configurations.
We can create as much configuration as we want, but only 10 can be
recorded in the watch at a time.
So if for example I want to go kayaking, I should sacrifice another activity,
like alpine skiing.
Here.
To create a new activity, I click on create a new sport mode, I give a name
to activity, and I select the type activity that it is.
The type of activity is basically to display the logo as we moves through the calendar.
We can then be easy to have a good idea of what I did day by day without clicking on an activity.
So, let's recreate together my activity to ride a bike.
The 8 watches we see here mean that you can have 8 pages of information in an activity.
And as you can see, the screen is divided into three parts.
Everything works the same way, as when we were navigating in the watch earlier.
Pages are what you see when you press on the next button.
And the lowest option can be swapped with the view button.
So the first page is not exactly as I want it.
By default it displays the distance traveled, speed and stopwatch.
I want to change the distance for the time of day.
Oh yes, never forget to put this option, otherwise, you risk to find yourself in a
rather embarrassing situation like that happened to me several times at the beginning.
-What time is it?
-Eh ... it's ...
Well ...
-Wait a bit...
-Well, can your super watch give the time of day?
Haha !!!
Wait a minute for sure I have it ...
YOUR SUPER WATCH DOES NOT EVEN HAVE THE TIME OF THE DAY !! ???
Pouhahahaha !!!!
-Well ... ok ...
No, the watch does not give the time if you do not put this option in the activity.
So, put it.
I click on the distance, and we can see all options available.
We will come back on this.
For now, the time is under time, then daytime.
We see that it has been changed.
For the bottom option, I want more informations.
We can put up to 5.
First of all I do not want the timer, I want the current altitude, then my pace,
to count my pedal strokes with a small device sold separately.
I leave you a link in the description to a device a bit like the one I bought.
Mine is discontinued.
This option is ideal to stay focused to our way of pedaling.
The important thing about cycling is not to keep the same speed, but rather the same pace.
Then I want to know the distance I traveled and my average speed.
Finally, I use an application.
Applications are developed by Suunto and the community.
I use the Sunrise / Sunset.
It tells me how much time I have left to the next event.
For example, an afternoon, it tells me I have 4h and 26 minutes left before
the sun reach the horizon, from my geographical position.
As soon as the sun has crossed the horizon, I will have as an indication the remaining time
before it rise again.
If you do not see sunrise / sunset, clicks on more apps and search it right here.
There is something for every taste.
As for example this one, which counts the number of beers that you can drink at the
end of activity to recover burned calories.
Click on Save App to add it to your applications.
Phillipe asked me the following question:
Hello.
I enjoyed this video.
Could you explain to me how to set up the watch about the calculation it does
automatically on the average speed to to maintain in relation to the sunset?
You say that in Japan you knew you had to to drive at 12km / h and that it was the watch that was calculating.
Thank you for your advice.
On this page we have all the information to do the calculation.
So, let's say I'm getting on my bike this morning.
I know because I checked on the map before leaving I have to travel 120km to wait for my goal.
And the watch tells me that the sun is setting in exactly 10h.
Dividing the number of hours remaining before the sunset by the number of km that
I have to go through, I know I have to do at least 12km per hour.
So when my average speed is 15km / h, I know that I can stop and rest.
I'll go back to the road before it says 12km / h or less.
Now, let's do another page.
On this I want information about my heart.
First, the average of my heartbeats since the beginning of the activity.
In big in the center, my heartbeats in real time.
Then for the lower part I add, the peak training effect, which is a scale
from 0 to 5 how about how much intense the activity is for you.
In short, the closer you are to 0, the lazier you are, and the closer you get to the 5, the more you push yourself to maximum.
I also want to see the calories burned, the temperature, the stopwatch and finally,
the hill grade live application.
This one allows you to see in real time the inclination of the hill your are in.
On the next page, I just want some information in relation to the elevation.
So first I want to know how many meters I climbed,
then the current altitude and then how much meters I went down.
The next page is a bit special.
By clicking on the sides arrows, we can change the settings of the page.
For example, I can display a graph of the last hour, and then select what to indicate.
Like the percentage of oxygen, the atmospheric pressure, heartbeat,
or as in my case, altitude.
Finally on the last page, I add information that I will not necessarily
look at, but I want it to be monitored to have them on the activity
graph at the end of the day.
What I mean is that if there is something you do not add, for example
temperature, you will never go see what temperature it was at a
precise location on the map.
So I add my oxygen level application.
This one, as it is an application, I have to check the box so it can log in the watch.
I also add the storm alert to have a audible warning if a storm is coming.
Below, we fall into other types of options.
Recording interval.
That is, how often does the watch check each data.
Unless doing an activity of more than one day without any way to recharge the watch,
I always take a second.
Because if you reduce the frequency, the graphics are less accurate, but the battery lasts longer.
Then we find the accuracy of the GPS.
For activities where I move quickly like cycling, running, downhill skiing, or
activities in the forest where satellite reception isn't very good, I recommend '' Best ''.
For a slower activity such as walk, '' good '' does the job.
In '' OK '' mode, the watch will only record a satellite point every minutes.
So many data will be very inaccurate.
But the battery will last around 200h.
Finally, we can choose in addition to GPS, which tool the watch should look for.
For example the heart rate sensor, a pedometer, the bike POD, which is the tool I referred
earlier that counts the pace and the power POD calculates a load of stuff, I never tried it.
For example, in advanced settings, we have an option to activate a sound
signal that will sound every time your heart beat falls under, or above, a fixed goal.
Ideal to remember that we are too lazy or you work too hard.
Autopause puts as it name says, the activity in pause when we stop, I never use it.
For the rest I never touched it.
At the end, all you have to do is click on save.
I'll let you configure you other sport mode.
Because in the end, you probably do not want not see the same options as me.
That's why the watch is customizable.
Once you have them all configured, you can also create multisport modes.
Like for example a triathlon mode.
I select all the sports I want, in the order I'm going to do them.
So swimming, cycling and running.
The activity will start with swimming, and holding the back lap button, the watch
will move on to the next activity, until the last one.
Let's continue to the following options, yes There are still lots.
Navigation.
It's an option I use every time I visit a big city, or go to a mountain.
The watch can record a total of 250 points.
We press the little more, we select the type of point that it is to better find it thanks to the icons, then we point it on the map.
Say I'm going Mount Sutton and want to get an idea all the way up where the summit is.
I can type his name in the search bar to find it quickly.
Then click very precisely on the summit.
After you name the point, you can save it.
Do not forget to activate it in the watch before you leave.
The road is an option I have never really used, but I'm learning a bunch
of stuff myself doing this capsule.
The option has changed tremendously and it's really well developed now.
Before, it was only possible to drop points by clicking on the map but now
it's able to create routes between two points on the map, prioritizing
cycling routes, walking or for cars.
We can easily create a cycling itinerary between two cities, or in a mountain
if the trail exists on the map.
The line will appear on the watch by report at our current position represented by an arrow.
Some are even already created by the community on the map and can be sorted by type of activity.
For example, by choosing mountaineering, and activating only the '' Roads '', I can
very easily find trails around my home.
Let's go for a ride in the adirondack.
Sliding my mouse on the point, a glimpse path is displayed in blue.
If I select this one, I can add the path already created by Surgite1971 to the watch of my choice.
I have just realized that we can display all our own movements on
the map for an overview of places that we visited.
Wow!
It's really great!
But OK!
I let you discover it for yourself, because we go back to this famous configuration page.
General settings.
This is where you can choose the language of the watch.
Personally, for all that is electronic, I prefer english.
I have never tried Suunto in French, maybe it is very well done but
I see too often poorly translated stuff in French,
so I always use english by default.
The GPS Time Keeping, I've always kept it on, but I've never seen it working by changing the time zone.
Here is the geolocation format.
WGS84 for World Geodetic System 1984.
This is actually the most common format that we find everywhere.
For example when we point a place on google map, longitude and latitude is
expressed in this same format.
Latitude 0 is the equator, while the longitude 0 is on the first meridian.
The same meridian we use for universal universal time clock.
So much so that it almost passes on Big Ben.
The map is then divided into 360 lines of longitude and 181 lines of latitude.
In this format, each square is divided in degree, to obtain a very precise location.
The other methods use minutes and seconds.
In minute each square is divided into 60, and each of the minutes is also divided into 60, for the seconds.
Some countries also use their own grid, and if you are military, you
probably use MGRS, for Military Grid Reference System.
Anyway, we continue with the watch.
The orientation, when selecting heding up, the map is oriented in the direction that you go.
So if we walk to the east, the east will be at the top of the watch.
With North up, you have to follow the direction of the arrow to know in which direction you go.
Personally, I much prefer heading up.
The alti-baro profile allows you to choose which graphic we see in the watch on the 2nd page.
In this option, we always see the altimeter.
In the second, we always see the barometer.
In automatic mode, the graph displays the barometer when we stay at the same
elevation point, and it changes to the altimeter as soon as there is a change of at least 5m in 12 minutes.
The declination we saw earlier directly in the watch.
Bike pod Calibration.
The bike pod calculates in addition to the pace, the covered distance.
But to do this, the watch must know the circumference of the wheel.
In my case, at every turn of the wheel, my watch count 2050mm in distance.
But I have not used it for a long time.
In my travels, the GPS calculates my distance traveled.
Then we come to the unit parameter.
You can choose how everything is displayed.
Metric, imperial, or I even find very convenient the advanced option.
But it's perfect for us in Canada.
At school we are taught the metric method, but as soon as we enter on job market, everything is imperial.
Probably due to our proximity to the United States.
We measure our speed and our distances in km, but as soon as we have to measure some
something physical, we express ourselves in foot and in inch.
The thermostat of the house is in Celsius, but we have no idea if water to
21 Celcius is hot or cold for swimming.
Because for water, we always speak in Fahrenheit.
We buy a kilo of flour, but we calculate our weight in pounds.
Personally I strive to use everything in metric, but I can never remember how much I measure in cm.
5 feet 11 inches 3/4 ... 182cm.
So thanks to Suunto, we can mix all these measures to better match each one of us.
And finally, the personal settings.
Here, we can only consult them, to modify them you have to click on movescount settings.
Suunto only wants to know as much as possible on you to give more accurate information
regarding your heartbeat, calories burned, and ...
We'll go through it quickly because there's is not much to explain.
Here one can put our account public or private.
When we jog every morning or that we leave and always come back to the same
place of every bike ride, it becomes a little easy to guess where we live.
Here I connected my account to Strava, who is an application that I love.
It is with this application that I am public.
Strava allows to put an area on the private card.
As I added Strava to my Movescount account, all my activities done with my watch are
automatically transferred to Strava.
I invite you to watch my video on Strava by clicking on the link at the top right.
And in connection, we find the application that we need to synchronize the watch.
I leave you also a link in the description to access the same page.
This application needs to be installed on your computer to synchronize your watch
with all that we have done.
Just connect the watch to the small clip that comes in the box and wait for the end of the synchronization.
And now, we're ready to go, and that's exactly what we're going to do ...
Next week.
I'll take you to the mountains to show you how I use it in the field.
Salut!😀
Thank you very much for watching this video.
I hope you enjoyed, if so, you can give me a thumbs up.
If it's not already done, join me by subscribing to my channel.
You can make the button appear by clicking on my face just below.
And do not forget to press that little bell nearby.
That way you'll be notified to each of my new publications.
You can also visit me directly on my website.
pascalmarquis.com
For even more content, subscribe to my personal email list.
The link is available in the description.
Waiting for my next publication, there is some other videos that you may not have seen yet.
Enjoy!
Salut!
-------------------------------------------
Tôi Sẽ Đoán Tên Của Bạn Trong 1 Phút! - Duration: 2:47. For more infomation >> Tôi Sẽ Đoán Tên Của Bạn Trong 1 Phút! - Duration: 2:47.
 -------------------------------------------
#MuteRKelly co-founder: We either want him in the jailhouse or the poor house - Duration: 2:40. For more infomation >> #MuteRKelly co-founder: We either want him in the jailhouse or the poor house - Duration: 2:40.
 -------------------------------------------
New Saraiki Song 2019 latest || Sada Dhola Kch H Tan || Latest Saraiki Songs 2019 ||Latest Songs - Duration: 3:56.
New Saraiki Song 2019 latest || Sada Dhola Kch H Tan || Latest Saraiki Songs 2019 ||Latest Songs
New Saraiki Song 2019 latest || Sada Dhola Kch H Tan || Latest Saraiki Songs 2019 ||Latest Songs
No comments:
Post a Comment