Hello friends ! If you like this mix please Like & share, sub channel. Thanks you very much !!
Talking Tom Pool LOST CITY Epic Funny Gameplay with Tom and Friends (Level 300-304)
Subscribe to:
Post Comments (Atom)
-------------------------------------------
ESOcast 151: Chile Chill 11 – ALMA from the Air - Duration: 4:45.
The Atacama Large Millimetre/submillimeter Array (ALMA) is a state-of the-art telescope to study light from some of the coldest objects in the Universe.
ALMA comprises 66 high-precision antennas spread over distances of up to 16 kilometres.
This global collaboration is the largest ground-based astronomical project in existence.
In search of our cosmic origins...
-------------------------------------------
Linh Cẩu lang thang tìm mồi ai ngờ lọt ngay vào ổ phục kích của bầy Sư Tử và cái kết (Hyena vs Lion) - Duration: 16:12. For more infomation >> Linh Cẩu lang thang tìm mồi ai ngờ lọt ngay vào ổ phục kích của bầy Sư Tử và cái kết (Hyena vs Lion) - Duration: 16:12.
 -------------------------------------------
Sanremo 2018,Michelle Hunziker gaffe choc in diretta: imbarazzo al festival | M.C.G.S - Duration: 3:40. For more infomation >> Sanremo 2018,Michelle Hunziker gaffe choc in diretta: imbarazzo al festival | M.C.G.S - Duration: 3:40.
 -------------------------------------------
Sanremo 2018: dove vedere la replica della terza puntata | M.C.G.S - Duration: 4:31. For more infomation >> Sanremo 2018: dove vedere la replica della terza puntata | M.C.G.S - Duration: 4:31.
 -------------------------------------------
차세대 포드 익스플로러, 2019년에 등장[dailycar kr love] - Duration: 2:45. For more infomation >> 차세대 포드 익스플로러, 2019년에 등장[dailycar kr love] - Duration: 2:45.
 -------------------------------------------
차세대 포드 익스플로러, 2019년에 등장[24/7 카] - Duration: 2:55. For more infomation >> 차세대 포드 익스플로러, 2019년에 등장[24/7 카] - Duration: 2:55.
 -------------------------------------------
L'isola dei famosi, nuove accuse shock di Eva Henger: 'Ecco chi usava marjuana' | Wind Zuiden - Duration: 3:34. For more infomation >> L'isola dei famosi, nuove accuse shock di Eva Henger: 'Ecco chi usava marjuana' | Wind Zuiden - Duration: 3:34.
 -------------------------------------------
차세대 포드 익스플로러, 2019년에 등장 - Duration: 2:50. For more infomation >> 차세대 포드 익스플로러, 2019년에 등장 - Duration: 2:50.
 -------------------------------------------
Al Bano e Romina Power torneranno insieme: la rivelazione shock | K.N.B.T - Duration: 2:35. For more infomation >> Al Bano e Romina Power torneranno insieme: la rivelazione shock | K.N.B.T - Duration: 2:35.
 -------------------------------------------
SOUTHERN CALIFORNIA VMHD || Water Raiders - Nguyen Hoang Huynh - Duration: 4:33. For more infomation >> SOUTHERN CALIFORNIA VMHD || Water Raiders - Nguyen Hoang Huynh - Duration: 4:33.
 -------------------------------------------
현대기아차, 신형 세타3 엔진 '전륜·후륜·미드십' 다 만든다[dailycar kr love] - Duration: 4:15. For more infomation >> 현대기아차, 신형 세타3 엔진 '전륜·후륜·미드십' 다 만든다[dailycar kr love] - Duration: 4:15.
 -------------------------------------------
또 하나의 고성능 픽업 등장, 포드 레인저 랩터 공개 - Duration: 2:40. For more infomation >> 또 하나의 고성능 픽업 등장, 포드 레인저 랩터 공개 - Duration: 2:40.
 -------------------------------------------
Mercedes-Benz A-Klasse 190 Elegance Lang - Duration: 0:54. For more infomation >> Mercedes-Benz A-Klasse 190 Elegance Lang - Duration: 0:54.
 -------------------------------------------
아우디, 지난달 '평택항 에디션' 214대 인도.. 불완전한 판매재개 - Duration: 3:51. For more infomation >> 아우디, 지난달 '평택항 에디션' 214대 인도.. 불완전한 판매재개 - Duration: 3:51.
 -------------------------------------------
[시승기] 테슬라 모델S 90D '확신과 불신 사이' - Duration: 12:33. For more infomation >> [시승기] 테슬라 모델S 90D '확신과 불신 사이' - Duration: 12:33.
 -------------------------------------------
현대기아차, 신형 세타3 엔진 '전륜·후륜·미드십' 다 만든다[24/7 카] - Duration: 4:25. For more infomation >> 현대기아차, 신형 세타3 엔진 '전륜·후륜·미드십' 다 만든다[24/7 카] - Duration: 4:25.
 -------------------------------------------
[시승기] 테슬라 모델S 90D '확신과 불신 사이'[ 자동차 세계 24_7] - Duration: 11:57. For more infomation >> [시승기] 테슬라 모델S 90D '확신과 불신 사이'[ 자동차 세계 24_7] - Duration: 11:57.
 -------------------------------------------
맥라렌, F1 전설 '아일톤 세나'를 되살리다[dailycar kr love] - Duration: 2:28. For more infomation >> 맥라렌, F1 전설 '아일톤 세나'를 되살리다[dailycar kr love] - Duration: 2:28.
 -------------------------------------------
Why Not to Buy a V6 Car (Inline 4 Cylinder vs V6 Engine) - with Scotty Kilmer - Duration: 3:32.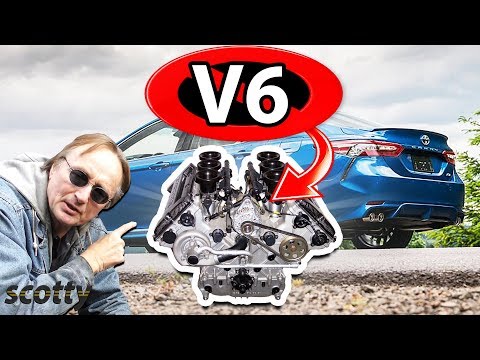
rev up your engines, today I'm going to talk about what should you buy, an inline
four-cylinder engine, or a V configuration six-cylinder engine, people
often ask me which one should they buy, so I'll give you a little history lesson
so you can understand the state of both engines these days
now the first really mass-produced car was a Model T Ford and that had an
inline four, it was easy to produce, simple and could last quite some time, but alas
they were slow as molasses, so then later they came up with V configuration
engines, which have more horsepower and torque because of their design, as you can
see on the V configuration engine, it has half the Pistons on one side and half
the Pistons on the other side, so it idles smoother and it has more torque
and power, but of course it costs a lot more money to manufacture, in the inline
four-cylinder engine, you can see there's less moving parts and it's easier to
manufacture it cost less, it does get better gas mileage, but it does have a
tendency to vibrate at idle and even at higher speeds it has more vibration, but
over the years designs have changed, a 53 Ford v8 put out a hundred and ten horsepower
and weighed thirty-two hundred pounds, but this 2007 Toyota Matrix, it has a
four cylinder engine, it puts on 126 less power and weighs
2,700 pounds, so it has more horsepower and weighs a lot less and check out this
late model mustang it has a four cylinder in-line and it puts out more
than 300 horsepower, it has a 2.3 liter four-cylinder engine, but what a
four-cylinder engine, it puts out 310 horsepower and 320 foot-pounds of torque
so for most people, you really don't need a V configuration engine, the four
cylinder in-line ones put out plenty of horsepower these days, now granted the V
configuration engine because of its design, is smoother, it idles smoother and
rides a lot smoother, but they can cost a lot more money to maintain, on this v6
design, you got to take off the whole intake manifold in order to change the back
three spark plugs, while in this four-cylinder engine 1,2,3,4 there are the
spark plugs, they just come in and out in five minutes and being smaller and
lighter, they get better gas mileage and I know some old timers are going to say
all those four-cylinder engines though they don't last long they burn
themselves out, well that's not true anymore, at least with well built ones like
this Toyota, it's got two hundred thirty nine thousand miles on it, doesn't burn
oil and still runs like a clock, in my experience it's the modern v6 engines
that actually wear out faster, they have more moving parts, they're more expensive
to repair and being cheap myself, they cost more money to buy, if you buy a v6 car
it's going to cost more than the 4-cylinder same car, as you can see in
these 2018 Camrys the four-cylinder one is 24,000, while the v6 is twenty eight
thousand four hundred and fifty dollars, now there's a little bit difference in
what's in the cars, but basically it's the difference between a four cylinder
and a six cylinder engine that you're paying for, so if you're wondering what
type of engines to get in your next car, my bets on a four cylinder in-line
engine, they got plenty of power and can last a long time with a little
maintenance, more quick fixes on the Scotty Kilmer channel,
so if you never want to miss another one of my new car repair videos, remember to
ring that Bell!
-------------------------------------------
Aplicación 4: Levanta Gomas/ Trimming & masking rubber seals - Duration: 2:12.
Application: Trimming & masking rubber seals
Tear off the amount of tape you need using the pre-cut lines
Tear off the narrow part of the tape and use the centrally reinforced section and the wide part
Insert the reinforced section between the rubber seal and the door frame
Place the centrally reinforced section on the edge of the door frame
Slide the tape along the frame
Repeat the process until all the rubber seals have been masked
Peel the protective strip off the wide part of the tape, pull the tape and stick it down
-------------------------------------------
Aplicación 8: Faro delantero/ Headlight - Duration: 2:32.
Application: Headlight
Tear off the amount of tape you need using the pre-cut lines
Tear off the narrow part of the tape
Insert the reinforced section between the headlight and the wing
Peel the protective strip off the wide part of the tape, pull the tape and stick it down
Repeat the process, sticking the wide part of the tape onto the headlight
Tear off another piece of tape
Tear off the narrow part of the tape and peel off the protective strip
Insert the reinforced section of the tape and slide it along
Place the centrally reinforced section on the edge of the door frame
Once it is in position, stick the tape down
-------------------------------------------
Aplicación 1: Gomas en puerta/ Rubber door seals - Duration: 2:02.
Application: rubber door seals
Make sure the surface is clean and dry
Tear off the amount of tape you need using the pre-cut lines
Place the centrally reinforced section on the edge of the door frame
Peel the protective strip off the narrow part of the tape and stick it inside the frame
Make relief cuts in the tape using the pre-cut lines to reduce stress and make application easier on the curves
Repeat the process until the entire area has been masked
Close the door
Peel the protective strip off the wide part of the tape
Pull the tape and stick it down on the outside
-------------------------------------------
Aplicación 7: Aleta trasera/ Side rear wing - Duration: 3:26.
Application: Side rear wing
Make sure the surface is clean and dry
Tear off the amount of tape you need using the pre-cut lines
Peel the protective strip off the narrow part of the tape and stick it inside the frame
Place the centrally reinforced section on the edge of the door frame
Make relief cuts in the tape using the pre-cut lines to reduce stress and make application easier on the curves. Use a Stanley knife if necessary
Close the boot
Peel the protective strip off the wide part of the tape, pull the tape and stick it down on the outside
To mask the back light, tear off the narrow part of the tape and use the centrally reinforced section and the wide part
Insert the reinforced section between the back light and the wing
Slide the tape along the wing
Peel the protective strip off and stick the tape down
Repeat the process until the entire back light has been masked
Tear off the amount of tape you need, tear off the narrow part and insert the centrally reinforced section
Peel the protective strip off the wide part of the tape, pull the tape and stick it down on the outside
Repeat the process until the entire area has been masked
-------------------------------------------
Aplicación 3: Maletero/ Boot - Duration: 3:28.
Application: Boot
Tear off the amount of tape you need using the pre-cut lines
Tear off the narrow part of the tape and use the centrally reinforced section and the wide part
Peel off the protective strip
Insert the reinforced section between the boot lid and the back window. Stick the tape down as you go
Tear off the amount of tape you need to mask the back light
Tear off the narrow part of the tape and use the centrally reinforced section and the wide part. Peel off the protective strip
Insert the reinforced section between the back light and the boot lid and stick the tape down
Repeat the process until the back light has been masked
Finally, tear off the amount of Chicane tape you need
Peel the protective strip off the narrow part of the tape
Place the centrally reinforced section on the edge of the door frame
Repeat the process until the entire boot lid has been masked
Make relief cuts in the tape using the pre-cut lines to reduce stress and make application easier on the curves
Close the boot
Peel the protective strip off the wide part of the tape and stick the tape down as you go
-------------------------------------------
Xiaomi Redmi 5 Plus Full Review: Is this the Redmi Note 5? - Duration: 8:22.
"Music"
Hey guys it's Sagar from Tecworkz.
I have been using the Redmi 5 Plus for the last 12 days, and here is how my experience
has been with it so far.
I was actually travelling right since the day I received it, so I couldn't film or
post its unboxing video for you guys, but here are all the things that you get inside
the box.
Yes you get this transparent TPU case in the box, which is a really sweet move by Xiaomi.
There is Chinese writing on the box, and that's because I got it from Gearbest, as it is not
yet available in India.
We have no clue, if Xiaomi plans to bring this phone to India, but if you still want
to get it for yourself, the purchase link and a coupon code to get
it for as low as $160, is in the description section, so make sure you check that out.
The coupon code are valid only on limited number of devices, so if you are interested
in this phone, make sure you grab it while it is still available.
Before start this review, make sure to hit the subscribe button, so you don't miss
out on any of the amazing videos, coming up on this channel.
The first thing that you probably noticed about the Redmi 5 Plus, is its big and tall
5.99 inch IPS LCD display, with a 18:9 aspect ratio, and the display is rounded at all 4
corners.
At density of about 400 pixels per inch, the display is pretty sharp, and you can easily
view it outside, maybe not in direct sunlight, but in most of the bright outdoor conditions.
The bezel below the display is a bit bigger than the one at the top, but this lower bezel
is not used for fingerprint sensor or navigation buttons.
We don't get capacitive navigation buttons, just the on screen ones.
I got this phone for about Rs.12,000, but when you hold and look at it, it feels much
costly than that.
I have it in Golden colour, but it is also available in black, light blue and rose gold
colour options.
This one has 4GB of RAM and 64GB of internal storage, but there is also another variant
with 3GB of RAM and 32GB of storage, and it comes at just under Rs.10,000.
The SIM card tray on the left, can hold 2 nano sim cards or one nano sim and one micro
sd card.
On the right side, we have the power and the volume buttons.
I'm not to sure if these are made of metal, but they feel rigid, and don't rattle at
all.
At the top we have the IR blaster and a 3.5mm audio jack.
And at the bottom we have the Micro USB charging port, microphone and a speaker grill.
Micro USB port is a bit disappointing, its 2018 and I think all manufactures, should
switch to USB type C ports, no matter the price of the phone.
From the back it looks exactly like the Redmi Note 4.
Everything, right from the aluminium back, placement of the fingerprint sensor and the
camera, and the two pieces of plastic at the top and bottom, resembles the Redmi Note 4.
Even the processor inside this new 5 Plus is Snapdragon 625, same as the one, on the
Redmi Note 4.
So basically the bigger display with 18:9 aspect ratio, camera, and a battery which
is 100mAh smaller, are the only things separating this phone, from the Redmi Note 4.
There have been rumours, that Xiaomi will be launching the Redmi 5 Plus in rest of the
world, as the Redmi Note 5.
I really hope that is not the case.
Don't get me wrong, 5 Plus is a really good phone at this price, but it is just not enough
of an upgrade from the Redmi Note 4, to be called as its successor.
Alright lets come back to this 5 Plus for now.
I really like the thin and longer form factor, that these phones with 18:9 display brings
along.
With the subtle curves to the back at the edges, it fits and feels good in my hands.
Fingerprint sensor at the back, is extremely fast and accurate.
This might very well be the fastest fingerprint sensor on a Rs.10,000 phone, that I have seen.
Call quality and cellular reception is pretty good.
And in case you are wondering, I have been using a JIO SIM card, and VOLTE seems to be
working just fine.
The output from speaker is good and loud, but don't expect it to sound deep, or pump
out a lot of bass.
Watching video is a really good experience on this big display.
You can pinch in, while viewing videos on Youtube, so the videos take up the complete
display, and you don't see black bars at the sides.
Redmi 5 Plus comes with all the necessary sensors like accelerometer, compass sensor,
gyroscope, GPS, proximity sensor and ambient light sensor, so kudos to Xiaomi for including
all of these.
You also have a small notification LED at the top right of the display, and an IR blaster
to control your home appliances.
By now, we have seen the Snapdragon 625 processor in numerous budget smartphones, and it is
famous for its reliability and ability of handling day to day tasks, really well.
You can run most of the games smoothly on this phones, but loading high graphics games
might take a bit longer, so keep that in mind.
You can play games and have multiple apps open in the background at the same time, but
even then, there are no heating issues.
Despite of having 4Gigs of RAM, the phone doesn't keep a lot of apps in memory, and
they have to reload when I get back to them from the app switcher.
Its not a big deal for a lot of people out there, specially considering the price at
which this phone comes in.
MiUI 9.2 based on android 7.1.2 keeps this phone flying.
I am not a fan of MiUI, but I still decided to use this phone without installing Nova
Launcher, and after 10-12 days of using it, I think I can live with it.
I specially liked the dual apps and dual spaces support right out of the box.
Now the battery is 4000mAh, which is a bit smaller than the Redmi Note 4, and this phone
also has a bigger display, so the backup is not as good as it is on the Redmi Note 4,
but it will still take you through a typical work day, and then some.
Just don't expect it to last for 2 days, like the redmi note 4 does.
It supports fast charging, so if you are charging with a fast charger, it can charge up in just
above 2 hours.
We have a single 12 megapixel camera with F/2.2 aperture, at the back, and a 5 megapixel
camera with a dedicated flash at the front.
With a few other phone giving us dual cameras in this price range, having a single camera,
makes us feel like we are missing out on a few features with this phone.
Now Xiaomi's Redmi series has never been too good with cameras.
But with the Redmi 5 Plus, you can get some sharp and detailed images in good lighting
conditions.
It captures skin tones very well, captures a lot of detail, and with the HDR turned on,
dynamic range is also very good for a phone at this price.
Low light performance is not the best, but I think it is slightly better than the Redmi
Note 4.
There is obviously a lot of noise, specially in the darker part of the images, but the
overall images are reasonably detailed and usable, I would say.
I am not planning to make a dedicated camera review of the 5 Plus, but if you want me to
make it, let me know in the comments.
As I said earlier in the video, biggest change between this phone and the Redmi Note 4 is
the display.
Rest of the things and my overall experience with it, is mostly similar to the Redmi Note
4, which was really good.
If you are looking to get a new smartphone, then the Redmi 5 Plus is really worth taking
a look at.
But if you already own the Redmi Note 4, I would not suggest you to get this phone, as
it wont be much of an upgrade.
Wait for Xiaomi's other launches coming up.
O n 14th Feb, if they launch the Redmi Note
5, with upgraded internals, dual rear cameras and 18:9 display, then you can upgrade from
your Redmi Note 4.
In any case do let me know what are your thoughts about this Redmi 5 Plus in the comments.
And again, for the price and availability, check out the links in the description section.
Please hit the like button if you enjoyed this video.
And subscribe to the channel, for more quality tech videos like this.
You can also check out some of the other videos from this channel.
This has been Sagar, and I will catch you guys in the next video.
Take Care.
-------------------------------------------
Maluma, Shakira, Bad Bunny, Becky G, J Balvin, Nicky Jam, Daddy Yankee, Wisin - Pop Latino Mix 2018 - Duration: 1:16:57.
Hello friends ! If you like this mix please Like & share, sub channel. Thanks you very much !!
-------------------------------------------
Francais facile en quatre règles (VIDEO 1) - Duration: 8:26.
French in four easy rules.
Hello, my name is Julia and I am the creator of Learn English with Julia
French: four easy rules.
I am Franco-British and I speak a number of languages fluently.
I teach languages, I coach language teachers,
I have also directed language schools in several European countries,
and I write teaching and learning materials.
So.
So all that to say that it's been ten years since I started. I have sat on both sides of the table:
learning and teaching.
And I would like to share with you today, through these videos,
my advice or my secrets to improve your French.
So let me know in the comments below
if you need a language to be added in the subtitles
or if you have questions or comments you wish to share.
Thank you anyway for joining me for this course, "Rule 1" to learn the French language.
Do not forget to subscribe to my YouTube channel if you haven't already!
And welcome to you all!
So thank you for choosing this French course, this video. Let's start the adventure,
this process, with this course entitled:
"The 4 rules to learn French."
Before beginning this rule number 1, I would first like to explain
in more detail what those "four rules to learn French" are.
You can now register on my website: www.learnenglishwithjulia.com
The link is in the description of the video.
So for each video you will be able to access not only this video course
but also the transcript of each video - which you can also download
if you want to read as you watch or as you listen to this video.
You will also have a multiple-choice exercise to check your understanding of the text
and via the links, below, in the description,
the translation of the text itself.
The French language interests you?
Each of the 4 rules will give you specific piece of advice that is both simple and effective,
to improve your French.
So to answer the question: "what is the purpose of this programme?"
The answer is simple:
It's to push you from a state of understanding (spoken and written)
to a much more active state, a state of expression (spoken and written).
I'll show you how to focus, how to optimise the use of these skills
towards better communication in French.
At the end of 4 online rules, you can sit a little test,
you can complete a small final quiz on my website,
to review what you have learned during these four rules (6 videos).
Learning French is easy: let's start!
Some tips before I reveal rule number 1 to you.
Things not to do when learning a language, or when taking French courses.
There are many ways of making learning French easy.
I've summarised 4.
1.
First thing to avoid: is to take group classes, constantly.
This is a good way to meet people and learn very slowly.
But it is certainly not the most effective way to learn a language.
There.
That's my opinion of course.
I'm not the only one who believes this, I hope.
But I think when learning in a group, it takes a long time.
It is better to be more selfish and learn more efficiently, by studying at home -
following the four rules I'll present to you, and take private classes
or review some points with a French speaking friend, occasionally
to receive some feedback and work on
your pronunciation of course.
Here you need a helping hand.
2.
The second point is that it is important not to cram,
or learn grammar in a mechanical way, without a context.
I will give you more information on that
in these videos.
3.
The third point or third thing to avoid is to listen passively.
If you listen only passively, you do not learn.
Again we will see this in more detail today in this video.
4.
The fourth point or fourth thing to avoid is to learn endless vocabulary lists.
If you learn vocabulary lists, mechanically and without context,
you will not know how to use these words in context.
In one of my other online French lessons on how to learn French
easily, in one of my programmes, I let you in on more secrets on how to
learn vocabulary effectively and naturally.
One can easily compare language learning with the practice of a sport,
regardless of our level.
As someone who did judo (not very well but I still did for 4 years) as well as
ballet, I can confirm that this is not the same: studying
the theory and actual practice (judo)
(lingo)
that suddenly we will know what to do once in the dojo or more precisely on the mat.
Theory by itself is not enough.
For ballet it is the same thing, but we will not go into details.
It was just to illustrate the point: we must combine theory with practice.
So: Rule number 1, you guessed it: we must listen to the French language,
Listen to French!
This French course focuses on oral comprehension (listening):
But don't just listen passively. You must also understand.
If I tell you a word in English.
I repeat: "arson arson arson ....".
If you do not know what it is - and despite the context you are in doubt about the meaning
of the word - we must translate it.
It's a criminal fire.
It was a random example.
It will be the same with French verbs.
Not understanding their meaning makes it sometimes difficult to understand the meaning of the sentence.
If you do not have a dictionary on you or
in your phone, try to guess the meaning of the word from the context,
looking at the whole sentence, and try and make the connection.
One can often find the meaning of a word or phrase that way.
This is true for learners of all levels.
It is a natural process.
There are many scientific studies that have been done on this.
Easy French: does it really exist, for adult learners?
The example I often use is children learning conjugation in
their native language.
They do not learn with conjugation tables, or a list of French verbs.
They are not given the Bescherelle or the Larousse dictionary.
That comes later, to perfect one's level.
The small difference on which I want to insist is: unlike in
your first language, we need to translate key terms from time to time, not all
the words, just the terms which you struggle with, because we do not have 6 years
to point at objects and repeat the words, as do parents with their children.
We need to create links, clusters (by translating).
-------------------------------------------
Škoda Octavia Combi 1.2 TSI ARCTIC | NAVI | PDC ACHTER | AIRCO | - Duration: 0:59. For more infomation >> Škoda Octavia Combi 1.2 TSI ARCTIC | NAVI | PDC ACHTER | AIRCO | - Duration: 0:59.
 -------------------------------------------
L'gosseux d'bois Ep 160 - Trépied en bois partie 1 - Duration: 19:33.
Hi, on The Woodpecker this week, I'm making this wooden tripod.
I really love my aluminium tripod. It's light and I use it each and every day.
But it has a big flaw. I can't film very high above the subject;
I always have to climb on furniture to have a top shot.
But this means I have to have something to climb on nearby...
This is the main reason why I want another tripod.
My new tripod will be inspired by the big professional tripods we have at work.
The legs are made of several tubes sliding one beside the other.
We also have some with a central post, similar to my own tripod.
So with those two models in mind, I drew up my own wooden tripod.
The first thing I do, is get some oak boards I have lying around to make the legs and their connecting blocks.
I begin by surfacing all my oak.
When I'm done, I can start the dowels for the legs.
On the router, I rout a half circle profile on each side of each boards.
Then I rip both ends.
And go back to the router table.
When I'm done, this is what my dowels look like. This is not too bad but I can clearly see it's not perfectly round.
So I do the rest on the lathe.
To remove the cutter marks, I just use a belt sander.
This is way better like that. The only thing I have to do, is cut one end
and check if it's ok.
Since this is perfect, I can take care of the blocks which will hold those dowels.
I begin by cutting all the blocks to the right length.
Then to the right width.
Next, I drill a big hole in each corner.
This takes a little while but now all my blocks have two holes.
I need to drill more holes in the centre block for the middle section and also one for the bottom dowel.
To have the holes at the right place, I use the actual bottom block to figure their placement.
Then, I can move the stop block and drill the holes.
All the holes are done except the centre hole of the middle block.
All done now.
But to hold the dowels in place when the tripod will be open, I need to cut a slot in the centre of the centre blocks.
To make sure the slot is wide enough and centered, I cut the slot from both sides.
Then, I drill the holes for the locking bolt.
On the top block, I need to remove both corners to make a hinge.
I mark all three blocks at once and cut their corners.
Now I can cut the dowels to the right length.
And screw them in the blocks.
When I screw the lower block of the top section, I make sure everything is well clamped to the workbench. This helps a lot.
I now have all three top sections; I can take care of the centre one.
But only now I realize that I have some dowels a bit too big...
I fix this with a spokeshave.
When it's ok, I can screw the middle section.
And finally put the lower dowel in place.
But the holes don't align perfectly on the second leg.
I fix this with a long drill bit.
Finally all three legs are done; I can start to work on the top of the tripod.
I begin by sticking my pattern on some cutoffs from my doors.
I'm really careful to stick this straight, the pattern's lines will be my reference.
I begin by setting the miter to thirty degrees.
I make the first cut; straight on the line.
Then I move the miter to the other thirty degrees and make the second cut.
Then move the miter to zero and make the last two cuts.
Those are the three pieces I cut. Now I need to remove this.
First, I move the saw blade to the right height, then I cut on both sides.
Before cutting the next ones, I check if it will fit over the top of the legs.
Since it's perfect, I cut the last two pieces.
Then I remove inside both cuts.
When I'm done, the bottom is a bit rough; I fix this with a rasp.
This is how this will fit later,
but before, I need to find the centre and drill a hole.
I also find the centre of the top block and drill it.
Before I can try my hinges, I need to cut a metal rod.
To help insert the rod, I chamfer its tips.
Now I can try this.
Since I'm confident this will work, I can glue the three pieces together.
I make a small mark over each joint and drill the mortises.
Now I can glue them together.
Pushing all three pieces together is not that easy; they really have to be at the right angle.
But when they're in place I can clamp this.
Now it's time to make the central post.
I begin by ripping two pieces of maple.
Between them I'll insert this snow brush.
First thing to do, is to remove the brush.
Then the scraper.
Both pieces will be glued together and the broom's handle is in the middle.
But to do so, I need to know the size of the handle.
But I have nothing to drill with that size,
so I'll begin with my biggest core-box bit and rout a half circle on both pieces.
This is a good start;
but it's not big enough. 0:09:48.700,0:09:51.740 So I change the router table setup and make more cuts.
Close, but not perfect.
I fine tune the router fence and make more cuts. I do this up until I'm satisfied. Then I glue both pieces together.
I want to be sure I have a tight joint, so I put a lot of clamps.
To clean inside the hole, I push a towel through it.
While this dries, I start the mobile centre of the tripod.
After ripping a strip of sapele, I stick my pattern on it.
Then I cut all three pieces. The first cut is quite simple.
But to cut the second thirty degrees cut, I need to stick the piece of wood on a piece of scrap wood.
I repeat the same thing for all three pieces.
Next, it's time to drill the pivots holes.
I need to remove this section of each piece, just like I did for the big one.
But they're too small to cut on the table saw so I remove the wood using the bandsaw.
Now, I can glue them together.
I do it the same way I did it with its big brother.
While the glue dries, I round over all the corners of all the legs' blocks.
Now that the glue of the central post is dry, I measure to check if it's perfectly square.
Since it's not, I plane this a little.
Then, I use a big quarter round router bit and make a cylinder.
Humm… When I check the tube, I can see it's not really round. I can even see flat spots.
So I decide to make this round using the lathe.
After a quick check, I know this will work.
Then, I glue small blocks which will help me later on to clamp the lower part of the legs.
I also have to make some U shape blocks. They will hold the movable supports to the legs.
Now I can remove the patterns.
This will work just like that, but with those square corners, I can't swivel the leg.
I fix this right away.
The central post will end-up just here; I need to drill a hole for it.
First, I find its centre. Not too difficult...
And I drill a hole, about halfway, the same size as my cylinder.
This is perfect; but I don't have a hole for the broomstick.
I find the centre on the other side and drill a hole.
Now I can glue the cylinder to the top.
But just when I'm done, I realize that I've drilled my hole on the wrong side.
The rounded edge should have been on the bottom...
I clean the glue and make another round over on the other side.
Now I can really glue this.
I use lead as weight while the glue dries.
I also check for squareness.
Now, I shape the central part.
While I'm at it, I round over the rest.
Now I need to make the strips which will hold the leg to the central hub.
Each end is drilled and rounded.
Now I need to assemble it all; just to check if it's working.
I use a drill to drive the shafts inside their holes. This has less chance of breaking something.
Humm... When I try this, something is wrong...
I notice that the back of the legs bump on the top of the tripod. I'll need to use my rasp again.
But before taking this apart, I measure the length of the central post and mark it.
Then I dismantle this and fix the top of the legs, just before cutting the central post.
Before putting it back together, I round over the three strips.
I also remove the burn marks.
Now I can put the broom stick in place.
I like that it's hard to move because the camera will stay put.
But now I need to make the head of my tripod but this will be the subject of the next episode of The Woodpecker.
-------------------------------------------
Why Not to Buy a V6 Car (Inline 4 Cylinder vs V6 Engine) - with Scotty Kilmer - Duration: 3:32.rev up your engines, today I'm going to talk about what should you buy, an inline
four-cylinder engine, or a V configuration six-cylinder engine, people
often ask me which one should they buy, so I'll give you a little history lesson
so you can understand the state of both engines these days
now the first really mass-produced car was a Model T Ford and that had an
inline four, it was easy to produce, simple and could last quite some time, but alas
they were slow as molasses, so then later they came up with V configuration
engines, which have more horsepower and torque because of their design, as you can
see on the V configuration engine, it has half the Pistons on one side and half
the Pistons on the other side, so it idles smoother and it has more torque
and power, but of course it costs a lot more money to manufacture, in the inline
four-cylinder engine, you can see there's less moving parts and it's easier to
manufacture it cost less, it does get better gas mileage, but it does have a
tendency to vibrate at idle and even at higher speeds it has more vibration, but
over the years designs have changed, a 53 Ford v8 put out a hundred and ten horsepower
and weighed thirty-two hundred pounds, but this 2007 Toyota Matrix, it has a
four cylinder engine, it puts on 126 less power and weighs
2,700 pounds, so it has more horsepower and weighs a lot less and check out this
late model mustang it has a four cylinder in-line and it puts out more
than 300 horsepower, it has a 2.3 liter four-cylinder engine, but what a
four-cylinder engine, it puts out 310 horsepower and 320 foot-pounds of torque
so for most people, you really don't need a V configuration engine, the four
cylinder in-line ones put out plenty of horsepower these days, now granted the V
configuration engine because of its design, is smoother, it idles smoother and
rides a lot smoother, but they can cost a lot more money to maintain, on this v6
design, you got to take off the whole intake manifold in order to change the back
three spark plugs, while in this four-cylinder engine 1,2,3,4 there are the
spark plugs, they just come in and out in five minutes and being smaller and
lighter, they get better gas mileage and I know some old timers are going to say
all those four-cylinder engines though they don't last long they burn
themselves out, well that's not true anymore, at least with well built ones like
this Toyota, it's got two hundred thirty nine thousand miles on it, doesn't burn
oil and still runs like a clock, in my experience it's the modern v6 engines
that actually wear out faster, they have more moving parts, they're more expensive
to repair and being cheap myself, they cost more money to buy, if you buy a v6 car
it's going to cost more than the 4-cylinder same car, as you can see in
these 2018 Camrys the four-cylinder one is 24,000, while the v6 is twenty eight
thousand four hundred and fifty dollars, now there's a little bit difference in
what's in the cars, but basically it's the difference between a four cylinder
and a six cylinder engine that you're paying for, so if you're wondering what
type of engines to get in your next car, my bets on a four cylinder in-line
engine, they got plenty of power and can last a long time with a little
maintenance, more quick fixes on the Scotty Kilmer channel,
so if you never want to miss another one of my new car repair videos, remember to
ring that Bell!
-------------------------------------------
La Fouine : Booba le tacle dans les commentaires sur Instagram, les internautes réagissent - Duration: 2:26. For more infomation >> La Fouine : Booba le tacle dans les commentaires sur Instagram, les internautes réagissent - Duration: 2:26.
 -------------------------------------------
schultrainer.de auf der FORSCHA 2017 und SPIELWIESN - Duration: 6:12. For more infomation >> schultrainer.de auf der FORSCHA 2017 und SPIELWIESN - Duration: 6:12.
 -------------------------------------------
Justin Timberlake surprend encore le Selfie Kid du Super Bowl - Duration: 2:25. For more infomation >> Justin Timberlake surprend encore le Selfie Kid du Super Bowl - Duration: 2:25.
 -------------------------------------------
UTILEV® - The Utility Lift Truck For more infomation >> UTILEV® - The Utility Lift Truck
-------------------------------------------
17 Beautiful Lipstick Tutorials for Beginners! New Amazing Lip Art Ideas Feb 2018 - Duration: 10:26.
-------------------------------------------
School Closures and Delays for Friday - Duration: 0:26. For more infomation >> School Closures and Delays for Friday - Duration: 0:26.
 -------------------------------------------
Plyler v. Doe - Duration: 4:00.
Mr. Beat presents
Supreme Court Briefs
Tyler, Texas 1975
Under the leadership of James Plyler, the Tyler Independent School District begins charging $1,000 a year for unauthorized immigrant students to attend school there.
It had justified this decision by a recent Texas law that said it wouldn't use taxpayer money to educate students who were not "legally admitted" into the United States.
Not only that, the law said school districts could deny students enrollment if their parents couldn't prove they were legal citizens.
And that's exactly what the Tyler Independent School District started doing.
In fact, in 1977 it began kicking kids out of school if they didn't have United States birth certificates.
In response, four families affected by this new policy sued the school district.
The district court, which, in order to protect their privacy identified them using pseudonyms, decided that the kids should be allowed to go to school and found both the state law and the school district's policy unconstitutional.
They argued the law and policy went against the 14th Amendment's Equal Protection Clause.
The school district appealed, and the U.S. Court of Appeals for the Fifth Circuit agreed with the lower court.
The district appealed to the Supreme Court, and the Court agreed to hear the case, combining it with a similar case, weirdly called Texas v. Certain Named and Unnamed Alien Child.
By golly that could be a great band name, come to think of it.
Anyway, the Court heard oral arguments on December 1, 1981.
The Court had a difficult time with this one, and wouldn't announce its decision until June 15, 1982.
In a 5-4 decision, they sided with the families, and struck down the Texas law that withheld funds from educating students who were illegal aliens.
The Court argued that illegal aliens and their children, even though they weren't citizens were still people, who deserved the same rights as protected under the Equal Protection Clause of the 14th Amendment.
Because they viewed education as a right, and because they weren't hurting the state that much by going to school, the Court said these students should be able to go.
Leading the dissent was Justice Burger, who argued it wasn't the judicial system's place to solve this issue, but that it ought to be solved through the legislative process.
This might surprise some, but the dissent actually said these kids should be able to go to school.
They just argued the Constitution didn't allow them to decide on this.
With all the debate today about DACA, or the Deferred Action for Childhood Arrivals, the immigration policy that lets the children of illegal aliens not get kicked out of the country among other things, Plyler v. Doe is an extremely relevant case.
Today, school administrators in K-12 public schools can't even ask about a child's immigration status.
Notice how I said K-12. Post secondary schools can still have restrictions based on citizenship status.
Years later, James Plyler, the superintendent who fought these families who wanted their undocumented kids to attend school, who in fact this case was named after, changed his mind.
On the 25th anniversary of the decision, in 2007, Plyler said that Texas law that withheld funds from educating students who were illegal aliens "would have been one of the worst things to happen in education - they'd cost more not being educated.
Right after we let those youngsters in, I was pleased."
I'll see you for the next Supreme Court case, jury!
What do you think about this Supreme Court case? Do you agree with the Supreme Court on this one?
I know it's controversial today. In fact, it's more controversial today than it was back then.
I also want to know how you feel about DACA. And remember to keep it civil down there.
How should we handle all these children of illegal immigrants?
Also, in celebration of Presidents Day, in the coming weeks I will have two videos about the Presidents.
-------------------------------------------
[ENG SUB] BANGTAN BOMB Behind the stage of '고민보다Go' heart ver @2017 MBC 가요대제전 BTS 방탄소년단 - Duration: 8:23.
BTS are preparing the stage(ga yo dae je jion)
We can do it well, right?
(Move) the right side when 'everybody' part.
In the direction we're facing the stage?
Do you know what's gonna pop up in this bag?
This heart will come out!
BTS guys prepared the heart shapes for ARMYs
It will come out of inside, guys.
It may not pop out cause it's a big size.
I want to do it so much.
Originally, I want to do it all.
like, you know, begin the event from 'dollar dollar' part.
like this.
But I think I did too much alone so I left this out.
So I made my huge size heart to satisfy me.
I'm greedy.
Suga checks the location of the hearts before the stage starts.
I'm nervous.
Don't be nervous.(in dialect accent)
I'm so nervous! (in dialect)
Namjun(RM)'s dialect. Nam-turi.(RMlect)
You feel 'nervous'?(He used English word)
Oh~
Yes, you look 'nervous'.
Yes, I'm 'nervous' (They keep the conversation in dialect.)
hey, you're intelligent!
The special stage starts!
(Fanchat)
I was so nervous especially when I took my heart out.
RM: I couldn't take the hearts off on my gloves!
I'm satisfying because fans liked our events.
I love you guys.
Did you guys see well the hearts popped up from my bags?
It's my heart(mind, feeling).
hey, Everyone.
Finally, the event is over.
During the event, I acted as usual.
ARMYs liked it, and we had fun, too.
The heart event.
I attached it to my butt.
Originally, I wanted to put some heart shape henna tattoo on my chest
So I was searching some tattoo shop, but I couldn't.
Because of time pressure.
Anyway, I'm pleased.
Happy new year.
It was very difficult event for me
because I'm not good at multitasking.
Compare with other small and cute friends.
So I was afraid, literally. (like '쫄다' in gogo's lyrics.)
I should have acted more bravely.
Anyway, I wish the people who saw our stage were happy.
Did you enjoyed our heart events?
I prepared it specially.
I put my stuff in my acorn bag and showed you guys.
I feel so good that I showed my hearts to you guys!
Please receive it well. Happy new year.
I'm very proud of do my best.
And I'm also happy that ARMYs liked it.
hattuu~~~♡(heart)
Everyone, take my hattuu~♡(heart) and happy new year.
Hello, everyone.
We prepared the heart event.
The reason why the event was created is fans.
ARMYs were hero/heroine at this stage, so we agonized how to express our thanks to them.
(Ah it's to hard to translate 'taetae language'T.T He spoke very long, but point is short.)
So Jin suggested this event.
Fans were so surprised!
Just, 'uh-ah!'
"Tae-hyeong-ah~~~~~~~~"
So I feel good.
We did special stage.
It was a 2017's last performance.
The stickers attached well at rehearsal, but didn't work at pre-recording.
So I made a mistake once.
But It didn't work because stickers were so sticky both side.
They sticked to the floor, not my sole.
So I changed it to more soft one.
Thereby I succeeded last stage well!
Not only the heart event
also there is one more stage left today.
The mic drop.
Fans loved it so much at MAMA.
But that was an English version.
We'll doing Korean version at MBC.
And then, It's all over. I'll be 22 years-old soon.
Fighting.
-------------------------------------------
HUỲNH LẬP | SẮM ĐỒ SALE - VIRAL GUNPOW - FULL 4K - Duration: 3:51. For more infomation >> HUỲNH LẬP | SẮM ĐỒ SALE - VIRAL GUNPOW - FULL 4K - Duration: 3:51.
 -------------------------------------------
[ENGSUB FULL]BANGTAN BOMB Behind the stage of '고민보다Go' Heart Ver. - Duration: 8:23.
BTS are preparing the stage(ga yo dae je jion)
We can do it well, right?
(Move) the right side when 'everybody' part.
In the direction we're facing the stage?
Do you know what's pop up in this bag?
This heart will come out!
BTS guys prepared the heart shapes for ARMYs
It will come out of inside, guys.
It may not pop out cause it's big size.
I want to do it so much.
Originally, I want to do it all.
like, you know, begin the event from 'dollar dollar' part.
like this.
But I think I did too much alone so I left this out.
So I made my huge size heart to satisfy me.
I'm greedy.
Suga checks the location of the hearts before the stage starts.
I'm nervous.
Don't be nervous.(in dialect accent)
I'm so nervous! (in dialect)
Namjun(RM)'s dialect. Nam-turi.(RMlect)
You feel 'nervous'?(He used English word)
Oh~
Yes, you feel 'nervous'.
Yes, I'm 'nervous' (They keep the conversation in dialect.)
hey, you're intelligent!
The special stage starts!
(Fanchat)
I was so nervous especially when I take out my heart.
RM: I couldn't take the hearts off on my gloves!
I'm satisfying because fans liked our events.
I love you guys.
Did you guys see well the hearts popped up from my bags?
It's my heart(mind, feeling).
guys.
Finally, the event is over.
During the event, I acted as usual.
ARMYs liked it, and we had fun, too.
The heart event.
I attached it to my butt.
Originally, I wanted to put some heart shape henna tattoo on my chest
So I was searching some tattoo shop, but I couldn't.
Time was pressing
Anyway, I'm pleased.
Happy new year.
It was very difficult event for me
because I'm not good at multitasking.
Compare with other small and cute friends.
So I was afraid, literally. ('쫄다' in gogo's lyrics.)
I should have acted more bravely.
Anyway, I wish the people who saw our stage were happy.
Did you enjoyed our heart events?
I prepared it specially.
I put my stuff in my acorn bag and showed you guys.
I feel so good that I showed my hearts to you guys!
Please receive it well. Happy new year.
I'm very proud of do my best.
And I'm also happy that ARMYs liked it.
hattuu~~~♡(heart)
Everyone, take my hattuu~♡(heart) and happy new year.
Hello, everyone.
We prepared the heart event.
The reason why the event was created is fans.
ARMYs were hero/heroine at this stage, so we agonized how to express our thanks to them.
(Ah it's to hard to translate..tae speaks 'taetae language'T.T He spoke very long, but point is short.)
So Jin suggested this event.
Fans were so surprised!
Just, 'uh-ah!'
"Tae-hyeong-ah~~~~~~~~"
So I feel good.
We did special stage.
It was a 2017's last performance.
The stickers attached well in rehearsal, but didn't work in pre-recording.
So I made a mistake once.
But It didn't work cause stickers were so sticky both side.
They stick to the floor, not my sole.
I changed it to a softer one.
Thereby I succeeded last stage well!
Not only the heart event
There is one more stage left today.
The mic drop.
Fans loved it so much when MAMA,
That was an English version.
We'll doing Korean version at MBC.
And then, It's all over. I'll be 22 soon.
Fighting.
-------------------------------------------
미우새, 고준희 토니안, 토니안 고준희 나이차, 토니안 이상형 고준희 몸매, 토니안 재산, 고준희 숏컷 단발|K-News - Duration: 3:35. For more infomation >> 미우새, 고준희 토니안, 토니안 고준희 나이차, 토니안 이상형 고준희 몸매, 토니안 재산, 고준희 숏컷 단발|K-News - Duration: 3:35.
 -------------------------------------------
Talking Tom Pool LOST CITY Epic Funny Gameplay with Tom and Friends (Level 300-304) - Duration: 11:21.
Talking Tom Pool LOST CITY Epic Funny Gameplay with Tom and Friends (Level 300-304)
No comments:
Post a Comment