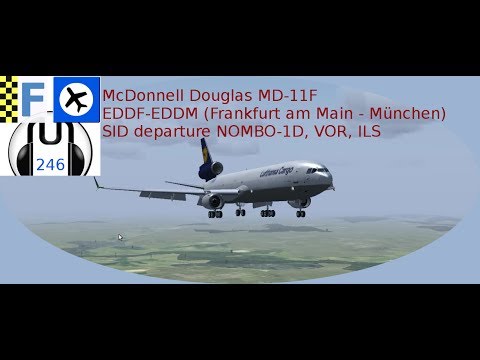
Hello and welcome on the Frankfurt Airport.
Today we are parked with the McDonnel Douglas MD-11 cargo machine, -- plane.
And today we are going to fly from Frankfurt to München, which is EDDM and we will take
a NOMBO SID departure.
It's the Nombo-1D departure.
At first we will have to refuel the plane.
You may notice I have a new microphone, I hope it's better than the old headset microphone.
So we are going to need approx. that amount of fuel and then we're ready to start the
batteries.
One thing I want to notice, I told you in one of my last videos that I will create a
checklist and I've done that so far and adapted some points from other checklists and I think
it's better working for me.
You can download this on a website it's flightgear-246.de.
There you can find this checklist.
This is a checklist for the McDonnell Douglas MD-11.
Maybe I will create some other checklists for other airplanes.
So, we are needing APU Power and Logo lights.
I will just follow my checklist.
Prestart - Parking brake is set, lets verify that.
Parking brake is set.
So we have the throttle is idle, fuel cutoff is all cutoff, batterie switch is on.
External Power, we don't need this, because we already activated the APU and Logo lights
are enabled, landing gear lever is down, flaps are up, yes, spoiler is retracted, route planned...
So now we are going to plan the route.
I already looked up which runway we should take, its 07C, so we will just insert it here,
07C, so we are going to fly to Munich -- München -- thats ok.
This is not westbound, i'm going to fly I think on FL190, that should work.
And I want to take a SID and actually we don't have any SIDs here, so we will insert it and
fly it from charts.
Basically its VOR Metro on 110.0 on radial 191, then a left turn after 10.8 DME that
should be the distance to metro, then we turn left to 105 degrees and after that we have
AMTIX, HAREM, LAMPU, GEBNO, NOMBO.
So we will just insert that.
First we will fly the VOR, I will fly that manually.
After that the turn also manually, Then we have AMTIX, theres no altitude value, so let's
have a look on the map at the basical route and I will now insert AMTIX.
There is no AMTIX, oh it could be AKONI, lets have a look if he knew that.
So, AKONI works, ok, then lets take this and go to HAREM, HAREM exists, HAREM after that
we are going to fly to LAMPU and GEBNO, and finally NOMBO.
So thats basically the route and after that we will plan the approach, I don't know which
runway is current and therefore I won't plan this at this moment.
Thats the route, so we are finished with planning the route.
I said 190 flightlevel.
One niner zero.
And I always enter 220 as speed.
So next one, my checklist, my checklist: Route planed, CHECKED.
Check weather.
I need some air pressure, and today I will fetch it from weather data and insert it just
in the instruments (GUI) it's QNH 1019.
Lets insert this.
Apply.
So, next is fuel quantity, I already checked that.
Fasten seatbelts, this is a cargo machine so that doesnt matter but anyway.
Fasten seatbelts.
Request clearance.
Currently we dont have an ATC available, so APU already started.
APU Bleed, external power off, it wasnt activated, air system auto.
So, let's put this to auto.
Beacon lights, enable Beacon lights, engine start.
Request pushback, so we will do the pushback during the start.
That is the pushback car, should appear now.
And I need the tiller steering.
And now we will pushback on N as usual in Frankfurt.
This is the ground chart, we are parked at one of this parking slots, and we will pushback
facing west on N, taxi down all the way, to runway 07C via N, N16 and line up and there
we go.
Thats basically the plan.
So for now, we just enabled some fuel pumps, we can find it here.
The thurst leaver was idle, already checked that.
Pumps are activated now, and X-Feed and electrical systems and now, we just start the first engine
and while this one starts up, we release the parking brake and do the pushback.
So, Oh.
Parking brake wasn't activated, so I, thats strange, normally its activated.
Thats also the reason why checklists are that important.
But, never mind.
Bleed air, packs, this is all set to auto.
So we start the next engine and do the turn for the pushback.
So, thats basically all for the pushback.
So now set the parking brake, pushback car goes away and next engine should be ready.
Lets verify bleed and packs are activated, so now the last engine comes up and I will
have a look to my checklist.
Engine area clear, fuel pumps on.
2 1 3 is engine start, bleed, we verified that.
After the last engine is started we can turn off the APU.
In a few seconds and after that we will enable the taxi lights, nav lights, hydraulic pumps,
now we can turn off the APU.
Its automatically, switched off the bleed for the APU, we need hydraulic.
Lets enable it.
So, hydraulic, APU is off, parking brake is already set, I will apply some flaps.
Flaps 15 or flaps 25 should be ok.
Tiller steering not at this time, pushback is done.
Request taxi, so no ground controller available, so we just turn on the runway lights and taxi
to 07C.
Release the parking brake and lets go.
So now we are basically there, we are now pretty close to N16, as you see on the ground
chart, there is one left turn for N15, this is the first sign and now we are at N16 and
just do that left turn.
Now we should be entering L21 to line up to 07C, so still no ground controller available,
so I will just line up and not holding short (and).
Thats basically all.
You may notice I have compared to my last video a much higher framerate now, thats due
to overclocking of my CPU.
It is not the most up to date CPU a Q6600 2.5, aeh, 2.4 GHz and now its overclocked
to 3.0 GHz.
And this is directly, ... And this yes caused higher framerates for me.
So now we are on our checklist: Before takeoff: Parking brake is set, Throttle is Idle, Spoilers
are retracted, autobrakes a reject take off.
Lets do this.
This are the autobrakes -- Reject takeoff, so that they wouldnt come up during the start.
And now we have RTO, check, Nav equipment, CHECK, so we will now insert the first VOR,
VOR METRO.
As we saw, its no fix, its a NAVAID.
Data, so lets insert it.
Wrong window.
Freuquencies, so here is NAV1, 110.0 is METRO and activate and the radial we have to fly
is basically Radial 191.
So lets insert it.
191.
And therefore, strange it should show up on the map.
110.0 is activated OK.
We will see if its working or not.
In the worst case we will just, I think it will show up if we start, lets show, lets
see.
So, thats all for this, now we have the last points, landing lights on, landing lights
and strobe and all that stuff.
Taxi goes off.
Strobe lights are on, request take off and thats all.
So lets go.
Release the parking brake and set a bit of thrust, approximatly 40% and after that, we
just set takeoff thurst.
Keep aligned on the runway.
And rotate.
Gear up.
Positive climb.
Flaps retract.
So now it looks pretty stable, so I will enable the autopilot and leave that heading.
Now the VOR is working, was working.
So, climbrate should be 2000 or 2500 fpm.
Thats ok, lets lookup the map.
The map is not that informative as I thought.
So, VOR is working.
And soon we will do our first turn.
Checklist, take off, positive climb, touch brakes.
Landing gear is up and flaps are up.
I will let the one stage of flaps till I will speed up to 250 knots.
And now I will insert our first turn.
The VOR is not working.
Now its working.
Soon we will see if this turn is good or not.
Maybe I should turn a bit less, but it could be exactly the turn I've needed.
Awsome framerates compared to my older videos, that is very very good.
So we are overshooting a little, so we should be a bit more to the right, so I will just
correct this with some degrees more to the right.
And sadly the DME station is not working.
Maybe I read the chart wrong.
And its not METRO.
DME FFM.
Mhh.
FFM.
Ok.
So VOR is set up.
I will now insert the DME 114.2.
And now we have the DME indication.
And after, if this value is a nine, we should turn left to 105.
Let's try it.
So, I will speed up a bit.
Flaps retract, we speed up to 250.
Climb rate is ok, we are above 10000 feet, so we can turn of this and seatbelts.
And now there is a nine, so we turn left 105.
105.
And all following waypoints are fix points, so we dont need the VOR thing.
Therefore I will switch to
the map view.
Map view.
Map view.
So in out route, the first point is AKONI, we will reach this point in 70 nautical miles
-- seven teen!
And we should be able to see it on the display.
So if we reach that point, I can enable the NAV1 and I will do this, ups, with the NAV
button.
And that should be all.
The following waypoints will be executed from the autopilot itself.
We can start to reduce the climb rate a bit.
The remaining 4000 feet we will climb with a lower climb rate of 1500 fpm.
And thats all.
So that should be enaugh, so we are reaching our final cruising altitude soon.
And now we are pretty close to AKONI, so I will now enable the navigation.
Important is that the next waypoint is activated for the autopilot
and this is basically visualized with this indication.
So the autopilot does a good job.
Ah, we are now above 16000 feet, and I read somewhere that we should insert the BARO setting
so airpressure from 29.92.
And this is done because of otherwise pilots would have to insert every few minutes a new
barometer setting.
And to avoid this all pilots above 16000 feets should insert 29.92 inches.
So thats it.
Next we will do the approach.
The autopilot will do the rest of SID NOMBO and that was basically the NOMBO-1D departure.
I think its more realistic to fly with departure SIDs, because of in real life its more easy
for ATCs and pilots to do departures.
And therefore I will use it in the future.
So we reached the last fixpoint NOMBO, so this SID departure is finished now and now
we are going to plan the landing.
So we will here the ATIS from München or Munich.
Frequencies, ah its already open, its not NAV1, its 123.12, sounds like a joke =). So
lets hear.
This is München Franz Joseph Strauss airport information Quebeck.
Time one two five zero zulu.
Expect ILS approach.
Landing and departing runway 08 wether.
Wind zero niner zero at eight knots.
Varying between zero six zero and one three zero degrees.
CAVOK.
Temperature two four.
Dew point one one.
QNH one zero two one hecto pascal or three zero decimal one five inches.
NOSIG.
Advise on initial contact, you have information quebeck.
As you see, that seems to be a faulty route in that...
CAVOK.
Temperature two four.
Dew point one one.
QNH one zero two one hecto pascal or...
One zero one one, lets enter it.
So I will fly a custom approach.
So, why are we turning?
Strange.
So, ok.
I should turn off that ATIS message, so.
We are going to land on 05(08!) and now we should start to descend.
First reduce speed.
I guess to 260 and lets start descending to five thausand feet.
With sinkrate of 1500 or maybe 2000.
So I will do the approach with that NAVAID so I will, ah nice it's a DME, so I will fly
towards this, lets enter it.
Its 108.40.
And the radial I want to take could be 160.
Lets have a look.
Ok, maybe 120.
Oh its too much.
150, thats ok.
Then we can turn to the ILS if we reach this point.
OK, its enabled.
The ILS data will be 08L it will be 109.5 and the radial I will enter later.
Ok.
So lets switch to VOR and we are 36 miles out and should descend a bit faster.
So.
Maybe lets have a look to my checklist.
Climb out was done.
Start approach.
Flight level reduced, report in, there is no ATC available, QNH is set, and on FL100
so flightlevel one hundret I will enable seatbelts and landing lights and now we are ready to
do our turn.
Should be right, yes.
Nice.
Maybe if we dont want to activate the ILS at this point, we could use another VOR, but
I think its a short distance, we can do this.
Also we should have in the map view, we should see at this point the runway data, cause of
its a waypoint.
So, we will know when to turn.
So, back to VOR.
A bit right, correction.
And now we are reaching our altitude of 10000 feet, so we will enable the runway/landing
lights and the seatbelts.
So the right correction is basically done, so lets turn back and start to reduce speed
-- two twenty.
If we are reaching this we should apply some flaps -- the first set of flaps.
Some clouds.
I dont know why the view is sometimes jumping around.
Twenty miles to go.
And lets reduce the sink rate.
In some planes if the sink rate is to heavy and the autopilot reaches the destination
altitude, the plane could do some strange things.
So, I guess it will overcorrect the vertical speed then.
Therefore I prefer to reduce the sinkrate a bit earlier, but in the MD-11 this shouldnt
be the case.
Lets have a look on the map.
Mh, can't see anything.
First set of flaps.
And reducing the speed a bit more to 180.
Next sets of flaps.
Yeah, it says flaps extended above maximum flaps extension speed, because of we were
one millisecond in the red area, I think it's no problem.
So let's have a look on the map.
We can do our turn a bit earlier and wait for the ILS to show up.
I think I will do that.
So I will just turn to 110, I think.
With an ATC controller this would be more easy.
Or we turn to 115, so we should reach the ILS just fine.
Ok, we left the radial of the VOR so now I will insert the ILS data.
Daaaata.
08L frequencies 109.5 and heading 080.
And insert.
We actually can see the ILS indication, I think there should be an approach mode, I
prefer this one.
ILS indications in the MD-11 are shown on this axis for the altitude or the glideslope
and on this axis for the, ... mh...
Orientation of the runway.
So the DME station we got this ILS left says 8 nautical miles, I don't know if its the
correct one, because of it says India Mike November Echo.
India Mike November Echo, ..., Can't find that.
Ok.
Now we turn into the ILS.
And now here is also an axis for the altitude indication and I turn to late,
so I overshoot a little, sadly.
Now I can activate the ILS landing with the approach land button.
And now it says we are on localizer and land is armed, so if the altitude indication reach
our current alitude, it'll start to descend.
Now we can see the last points on my checklist.
Its speed 160 and we should set the next set of flaps.
Gear should be down, I'll activate the gear if we are on altitude 2000 feet.
Next set of flaps.
Parking brakes check off -- is off.
Autopilot off, is not at the moment.
Autobrakes, I'll set the autobrakes to medium.
So, the last point is gear down, lets lower the gear and so the final approach from checklist
is done.
ILS is good aligned.
Altitude is handled.
And we are already on the last set of flaps.
So I hope, the runway will be in sight in a few seconds.
At the moment we are 8 miles out.
Nice, nice.
Here we can see the landing lights and the full extended flaps.
And there is the runway.
And whats with the trim?
Ooeeh.
We will see if its going to be a problem.
So I will now take over manually.
I, one thausand checked.
[five hundred].
five hundred, we are a bit low.
[glideslope].
[three hundred] [minimum, minimum].
Continue.
[one hundred].
[fifty, fourty, thirty, twenty] retard! [ten].
Thrust reverse.
And 80 knots, manual braking.
Flaps up.
APU start, taxi lights on.
After approach: Taxi light on, APU on, flaps retract, clear of runway (ATC), actually there
is no ATC, so I guess, landing lights can be switched off.
So, I think this wasn't the baddest landing and we landed safety (safely) in München,
or Munich, however you like.
I missed grabbing some ground charts from munich, but I guess we should navigate now
to the right.
And I will see you at the gate.
So, thanks for watching, give a thumbs up if you liked the video.
Maybe you have some pointers for me, what I should record next.
And then I would say, see you soon :)
 For more infomation >> Battle Marawi : Duterte's military fights to take control - marawi city | marawi isis - Duration: 1:13.
  For more infomation >> Ca sy duong pho hat bai bac trang tinh doi-khong biet chu ma van hat nhu thanh-youtube - Duration: 7:24.

 For more infomation >> WHO IS STUPID WHEN PLAY RUSSIA AGAINST CHINA - Duration: 6:16.
  For more infomation >> COMMENT VOYAGER SOUVENT AVEC PEU D'ARGENT - Duration: 14:58.

 For more infomation >> Phim Hoạt Hình: TIỂU BỐI BỐI Cảnh Sát Liên Hành Tinh- Tập 1 - Duration: 10:51.
No comments:
Post a Comment