V, The ORG Boss
www.theorgboss.com
Subscribe To Our Channel For More Organization Ideas & Product Reviews!
-------------------------------------------
#СЕМЕЙНЫЙ КАЛЕНДАРЬ своими руками. ЗАЧЕМ нужен семейный календарь? - Duration: 3:25. For more infomation >> #СЕМЕЙНЫЙ КАЛЕНДАРЬ своими руками. ЗАЧЕМ нужен семейный календарь? - Duration: 3:25.
 -------------------------------------------
Mehrgenerationenkirche – wo gehts lang? – Bayless Conley - Duration: 27:53. For more infomation >> Mehrgenerationenkirche – wo gehts lang? – Bayless Conley - Duration: 27:53.
 -------------------------------------------
[CC字幕] 少女編號 第12集 完 台灣中文配音 - Duration: 23:50. For more infomation >> [CC字幕] 少女編號 第12集 完 台灣中文配音 - Duration: 23:50.
 -------------------------------------------
Ghost in the Shell For more infomation >> Ghost in the Shell
-------------------------------------------
Toyota Verso-S 1.3 VVT-I ASPIRATION Automaat - Navigatie - Parkeercamera - Cruise control - Duration: 0:54. For more infomation >> Toyota Verso-S 1.3 VVT-I ASPIRATION Automaat - Navigatie - Parkeercamera - Cruise control - Duration: 0:54.
 -------------------------------------------
Audi A6 Avant 2.0 TFSI SPORT EDITION S-LINE Xenon, Bose, 18"LM - Duration: 1:00. For more infomation >> Audi A6 Avant 2.0 TFSI SPORT EDITION S-LINE Xenon, Bose, 18"LM - Duration: 1:00.
 -------------------------------------------
ŠMOLKOVIA: ZABUDNUTÁ DEDINKA (spot B) - v kinách od 30. marca - Duration: 0:32. For more infomation >> ŠMOLKOVIA: ZABUDNUTÁ DEDINKA (spot B) - v kinách od 30. marca - Duration: 0:32.
 -------------------------------------------
iHome isp5 & isp8 WiFi Smart Plug Setup and Review for your Amazon Echo DIY Smart Home - Duration: 15:30.
- Interested in the iHome SmartPlug or other Wi-Fi-activated
plugin modules for your DIY smart home?
Today we're going to set up, review and do a little
troubleshooting with the iHome iSP5 and iSP8
SmartPlugin modules.
As an added bonus, we'll compare this plugin module
to the WeMo and the TP-LINK Wi-Fi switches
to get an idea what they're all about.
Stay tuned.
(electronic music)
Hi everyone, John Stone, The DIY Smart Home Guy,
here to help you through the ins and outs
of the iHome Control Wi-Fi SmartPlug.
If you've spent any amount of time in my channel,
you'll see quite a few reviews on various plugin modules.
To date, all of these have been Z-Wave modules
that require a smart home hub like the Wink Hub 2,
or the Samsung SmartThings.
Today we're going to look at the iHome iSP5 and iSP8
Wi-Fi SmartPlugs.
I've also invited Eric from Modern Day Family Man
to help out with the Apple stuff.
He'll be making an appearance later in the video
to walk us through how to use the iHome plug
with both Siri and SmartThings.
You can find a link to Eric's channel
down in the description with all of my other video
and affiliate links.
Eric does a lot of videos on things I don't really
talk about much like trackers and trackers
and trackers and trackers.
I think there's a crack in my ceiling.
Just busting on you, Eric.
All right, so what makes this plugin module so darn special
that it deserves its own segment?
Is it because it's smart?
Nope.
Is it because it's Wi-Fi?
Mm-mm.
Is it because it works with Alexa?
No.
So what makes this little wireless gem so special
is that it doesn't require a hub
and yet it works with most major hubs.
In part one of my start your smart home series,
I stress the important of two things.
One was having a plan, and the other was having a hub.
So I personally have no real interest in a smart device
that can't connect with my smart hub.
These iHome SmartPlugs connect to on app on your phone
using Wi-Fi, but they can also be controlled
through Apple HomeKit, Siri, Wink Hub, SmartThings, Alexa.
And they even threw in Nest support for good measure,
which means you can control this from your iPhone
or Android device, voice control or as part
of your larger home automation plan, which, as I said,
should include a hub.
When you compare the size of this to the TP-LINK,
it's about a third of the size.
And if you compare it to the Belkin WeMo,
oh my God, it's like a quarter of a size.
I mean, like, the WeMo ain't we no mo, or something,
I don't know.
So let's take a closer look at the iSP5.
The first thing that stands out is the slim design.
It's super small and compact, which means that you retain
the use of both outlets, regardless of which one
you put it in, top or bottom.
The plug has all of my favorite features,
mainly manual control and an on/off indicator light.
On the top right corner you'll find a manual control button.
And in the lower left corner, you'll see the on-off
indicator light.
The only drawback is that this isn't a dimming module.
But on the other hand, it is rated for appliances
and all types of lights.
Besides hitting a home run in the size, functionality
and cross-platform support areas,
being a Wi-Fi plug means that it can accomplish things
that a Z-Wave plug can't, like controlling power
to a smart hub, for example.
I mean, let's face it, every now and again
our computer gadgets need a reboot.
My experience is that the Wink Hub and the SmartThings hubs
are no different.
So having a Wi-Fi control plugin model controlling
the power to my hub, means that I can do a power reset
even if I'm away from the house.
Now before we go too far, here are a few things
that you should know.
The iSP5 is not compatible with five gigahertz
Wi-Fi network, so you'll need to connect your phone
and the iSP5 to a 2.4 gigahertz network for the set up.
If you're having trouble pairing your iSP5 or your iSP8,
I left a link to the product troubleshooting guide
in the description below.
The first thing that you're going to need to do
is download the app and setup an account.
Once you have the iHome app installed,
we can go in, in that module.
All right, so let's go to the lab
and get this thing installed.
So the first thing you're gonna need to do
from your mobile device is you're gonna need to go
to your Play Store or your App Store
and you're gonna want to look for the iHome Control app.
Get this downloaded and let's go get it set up.
Okay, when you set this up, you're gonna have to do
the normal things.
You're gonna have to create a username and a password.
All that's pretty basic.
We're gonna take our module and we're just gonna
plug it into the wall.
Now as soon as you plug this in for the first time,
you're gonna get this green blinking light right here
on the corner, all right?
Now the other thing the manufacturer recommends,
this is in the link in the description below,
but one of the things you're gonna wanna do
the first time you ever set this up,
they recommend that you push and hold the on/off button.
And it says it could be up to 15 seconds.
You're really waiting for this to go where it flashes
red, green, red, green, red, green.
So let's give that a chance.
Once it does that, you'll let go.
Led will go out and then it's gonna come back on,
it's gonna flash green.
What that does is that resets this module
in case there's anything going on inside this module like
they were doing factory test or maybe it was a return.
You're gonna wanna do this reset first.
Back in our app, we're gonna go over to the second icon here
which is Devices, and we're gonna get
that little add device.
And we have the iHome SmartPlug.
Tap that.
And then we click Next.
And right here on the screen they're telling you to do
the reset before you try to do anything else,
and it's basically what we just walked you through.
Also, ensure that we're connecting to
a 2.4 gigahertz device.
Next, now this is automatically going to search
for a device in our area.
And there it is, it's found my SmartPlug.
And continue.
Here we go, this could take a while.
All right, so remember I said you're gonna want your phone
on your 2.4 gigahertz network.
And when you do that, it's automatically gonna come through.
Click Done, and then you go into setting up device mode.
On the bottom of your switch here,
you're going to have a number code,
which I've partially blanked out and I'm not showing you
because I don't want you to have my code.
You're just gonna put that in front of the camera here.
let's set it up the right way.
It's gonna read that code and start pairing everything in.
Okay, so let's plug that back in.
- [Computer voice] Hmmm, I can't find the answer
to the question I heard.
- I didn't ask you.
All right, so this is a light.
Next.
And I'm gonna name this Lab Light, and Next.
And it's on my lab wall, that was the room
I already had, so select that and say done.
And there it is, my lab light.
Okay, so we've repositioned the lamp here.
Hope it's stable up on top of my wall there.
And we've got it plugged into the iHome device.
Now let's just give it a quick test.
And one thing I really like about Wi-Fi SmartPlugs
is these things are superfast.
You don't get the one, two, three-second delay
that you'll get out of a Z-Wave hub.
So now we've got this light, this plugin module here.
This is connected into the iHome app.
Now just a couple of other quick tours here.
There's a number of preset things that you can do
to set up, good morning schedules, leaving homes.
These can be just quick keys that will turn lights
on and off for you.
You can also come in here and you can set up rules.
If you have a smart hub already, SmartThings,
this would be like a routine.
Wink Hub, this is like a robot.
So you can add rules here.
And then there's other settings that you can do.
We're not really gonna walk into any of that.
I encourage you to just play around with your app.
But the next piece that I wanna do is I wanna show you
how you get this set into your Wink Hub.
So in the Wink Hub, standard installation,
you're gonna come down and you're going to find your hub.
Add a product.
We're gonna go down to power.
And number two on the list, there's our iHome SmartPlug.
Right?
And we're gonna come over here.
Now we already have the account,
that's one of the first things we did
was set up the account.
So I have an account and we're going to do the connect now.
The Wink app is now gonna take you over
to an iHome login screen.
You're gonna wanna enter your iHome credentials here.
And once you enter in your login details,
you're gonna get this screen right here,
which is allowing it to authorize,
which is authorizing it to connect to your devices.
Then you connect.
So we're good to go right now.
We can just tap on that.
And you see it's still pretty quick.
Now that I have this controlled through my Wink Hub,
I can do anything here that I can do with anything else.
So I wanna do something fun.
I've got this switch right here which controls
my lab light.
This is my Lutron Caseta dimming module
and have it hooked under a three-way switch.
Find the video for that right here.
So anyway, we're gonna set this up so that
by turning this light on, it'll turn this light on.
And how we're gonna do that is we're gonna go over
and do a robot real quick.
New Robot.
And we're gonna name that Lutron turns on iHome, all right?
So when something happens,
and that something is going to be Lutron Lab turns on,
save that, do that anytime,
then what I want to happen is I want that iHome.
So I want to come down to my lab light
and I wanna say turn that on.
And that's an enabled robot, click Done, Done.
All right, so I've got that robot there.
Now what should happen is when I turn my Lutron on,
that robot should fire.
And it turns on that light.
Little bit of a delay, but that's the thing
you get with robots.
Not too bad, one, two seconds.
So now this is, as I said, fully integrated
with my Wink Hub so I can do anything here.
And if you saw my Stringify video,
you can actually hook this in with Stringify
directly through the Wink.
You don't have to add any other skills in or apps in
to get any of that stuff done.
So that is that, pretty cool.
Okay, so the last thing we're gonna do is we're gonna
get this hooked into our Amazon Echo Dot
and we're gonna do the devices added in the normal way.
Computer, discover devices.
- [Computer voice] Starting discovery.
This can take up to 20 seconds.
Discovery is complete.
I found 85 smart home devices.
- 85.
That's probably because I have a lot of shortcuts
and Stringify flows in here as well.
I think I really have somewhere around 50 but
I'll take 85, hmmm.
Okay, anyway, now that, that's added in,
what we can do is we can simply say
computer, turn lab light on.
- [Computer voice] Okay.
- Pretty fast.
Computer, turn lab light off.
- [Computer voice] Okay.
- So just recap, I have this running through the iHome
Control app for my phone.
I've got this connected into my Wink Hub.
I've added in that robot, which is gonna automatically
turn it on if I turn on a switch in my house, for example.
Or I can just simply say, computer turn lab light off.
- [Computer voice] Okay.
- Computer, turn Lutron lab off.
- [Computer voice] Okay.
- Simple as that.
So let's turn this over to Eric for the SmartThings
and Siri integration.
- Thanks John, today we're gonna be talking about tracking.
Okay, I've been doing a lot of videos on trackers lately,
but they're so much fun.
You can track your keys, you can track your wallet,
you can track your purse, you can track your phone,
you can track your car, you can track your TV remote,
you can track your pen, you can track your food,
you can track your water, you can even track
your kid or your wife.
I actually do, do other things on this channel,
anything from technology reviews to home automation,
to how-to's, anything that might interest a family man
definitely might be on this channel.
So as John said, I am Eric from Modern Day Family Man.
There will be a link to my channel down below,
so definitely check that out.
We are here today to take a look
at the iHome Smart Home Plug.
I actually have the iSP8 version which is, I believe,
the newest version.
And John would definitely leave some links down below
so you guys could get more specs on these products.
We're gonna look at how to sync it up
with Apple HomeKit and also how to hook it up
with the SmartThings hub.
Let's go ahead and get started.
So to hook it up to your Apple HomeKit
is actually extremely easy once you have your iHome app
setup and working, which John has already reviewed.
Once you do that, all you have to do is go into
the HomeKit app and boom, you have it, you're done.
It is simply that easy.
And just like John said, look how fast this works.
On, off, on, off, almost instantaneous.
Very similar to Amazon's Alexa system,
you can simply say, hey Siri,
turn on the family room lights.
(tone beep)
- [Siri] Okay, the family room light is on.
- And just like that, they're on.
I'm pretty certain that Apple is working
on their home speaker, very similar to the Amazon Echo.
In the future, John or I will have some videos
on some automation or scenes for the Apple HomeKit,
so definitely stay tuned.
Let's go ahead and take a look at the SmartThings app.
All right, so you can see I do have a couple.
I have a garage door sensor,
I have an outlet, I have phones connected,
I have frontdoors, backdoors all connected.
All right, first thing you got to do is go all the way down
to the Things list and click Add a Thing.
So it says it's looking for device.
All right, so it's not finding it
so we're gonna add the device manually.
And we're gonna say this is a,
all right, we're gonna call this an outlet.
And this is the iSP8,
and we're gonna say Connect Now.
Connect with your iHome account,
which we do have that.
And we're gonna put in our username and password
and hit Login.
SmartThings would like to access your devices.
And we're gonna authorize.
All right, iHome is now connected to SmartThings.
Hit Done to complete the setup.
You can select to have certain devices connected
or connect all of them.
Let's go ahead and connect all of them.
Hit Done.
Okay, so it did add it.
Here's the family room lights.
Let's go ahead and click on.
Bam, and that's it guys, it's how you hook it up
to your SmartThings hub.
I wanna thank John for allowing me to come on
to his channel.
If you wanna check out my channel,
there is a link down below.
And let's go ahead and pass it back to John.
- Thanks, Eric.
So as I said earlier, this is very a versatile module
and definitely my favorite Wi-Fi module without a doubt.
Thanks for watching.
Don't forget to subscribe and don't forget to click like.
Over here are a couple of other videos that you might enjoy.
For more reviews, tips and DIY videos, visit AZHB.com.
And thanks to all of you that already follow me
over on Facebook or Twitter.
Both are @DIYSmartHomeGuy.
Until next time, cheers.
-------------------------------------------
Auralic Altair - Duration: 13:35.
Auralic made name with their Aries streamer that not only offered low jitter signals over
AES/EBU and SPDIF but also offered a very clean USB 2 Audio Class 2 signal to USB DAC's.
The Auralic Altair is not just a streamer but a DAC as well.
The Altair is housed in the rather tasteful cabinet that is used for other Auralic products as well -
though not the Aries.
As said, the Altair is a streaming DAC but you can also look at it as a digital pre-amp,
given the numerous inputs.
Never the less the front looks very clean with only one control on it.
This rotary encoder functions normally as a volume knob but when pressed, switches to
controlling the menu.
A green on black display shows the choices and when in playback shows the set volume,
a play/pause indicator and the Auralic name.
A small red LED lights up when the unit is switched on.
A 6.3 mm headphone jack is situated on the right.
The display can be dimmed or switched off all together.
Let's have a look at the back: There is a mains input with power switch and fuse.
You also see two antenna sockets for the tri-band Wifi.
Then we see the network connector, a USB A socket for storage devices, a USB A socket
to drive an external DAC, a USB B socket to use the Altair as a USB DAC, plus the normal
digital inputs: TOSlink, SPDIF and AES/EBU.
Other more virtual inputs are Bluetooth - using the lossy ATPX compression -
and Airplay that is limited to 48 kHz.
As a network renderer the Altair is also very versatile: Songcast, uPnP/DLNA, Tidal, Qobus
and internet radio, all using Auralic's own Lightning DS user interface.
There currently only is an iOS app but it runs smooth and fast enough not to irritate.
Alternatively you can use Roon or Roon Essentials since the Altair is also Roon Ready.
You can have the supplier build in a 2.5 inch hard disk or SSD and play from there too.
Installing the harddisk yourself is not allowed and will void warranty.
For outputs the Altair provides both asymmetrical outputs on RCA's and balanced outputs on XLR's.
The volume control changes the volume on both the line outputs plus the headphone output.
When we look inside, we see on the right the linear power supply that is preceded by a
Schaffner mains filter.
The middle section contains the usual interface chips, like the clearly visible XMOS.
More interesting is what's behind these chips: like the Aries the Altair is based
on the Auralic Tesla 'computer' that uses a 1 GHz quadcore ARM Cortex A9 processor with
1 GB DDR3 memory on board and 4 GB system storage.
This small computer is housed on a separate pcb that is connected to the main pcb using
an edge connector.
On the right of it there is a SATA and harddisk power socket for connecting the 2.5 inch harddisk
or SSD in the all metal cage between the pcb and the front.
The harddisk is mounted in rubber-like fixes to prevent acoustic noise.
Below the ribbon cable that connects to the front there is a Wifi and bluetooth radio pcb
that is connected to the two antenna sockets on the rear.
The d/a-conversion and analogue output stages are separated from the rest using a metal shield.
The ESS 9018K2M 32 bit stereo DAC chip is well respected and has not only a good sounding
digital volume control but also a jitter reducing provision and the option to use proprietary filtering.
As I have said before, the use of this very DAC chip on it's own is no guarantee for a good sound.
But Auralic has a reputation where jitter is concerned and that shows here.
Not only is there a roomy layout but there is a clear separation between the DAC and
the rest while the dual frequency Femto master clock oscillator is mounted very close to the DAC chip.
Of course a local voltage regulator provides a very clean voltage.
That all showed in measurement.
During measurements I wanted to repeat several measurements since the results were so 'clean'
I thought the Altair had muted.
The most remarkable was the linearity measurement.
I usually don't show measurements but this time I do.
This linearity measurement shows if all digital amplitude values are correctly converted to
the corresponding analogue voltages.
The yellow line shows the input-output relation.
So where the lines of minus 60 dB on the Y scale and minus 60 dB on the X scale meet,
there the yellow line should cross.
The same goes for any value on those scales.
To make things easier, the red line shows the deviation from the optimal.
At -110 dB the deviation is only 1.5 dB and at -120 dB it stil is only 5 dB's.
Very good figures that also show that the noise is very low for otherwise the noise
would have masked the test tone and values would have been higher at low levels.
Enough tech, let's go to the real world use.
Since the Altair functionally is a chameleon, you have to think about how to use it.
The most obvious choice is to use it with the Lightning DS software on an iPad.
Although an iPhone is also possible, the smaller screen is less convenient.
You simply download the Lightning DS app from the App store and start it up.
The Altair -and other Auralic streamers when present -will show up.
Simply select it and follow the instructions to point it towards your music.
Here again you should have planned ahead where to store the music.
It can be on the optional internal 2.5 inch harddisk or SSD.
Both are available to a maximum of 2 Terrabytes and it depends on what music at what sampling
rate and what file format is used how many albums can be stored.
Normal cd- quality encoded with FLAC or Apple Lossless would be around 400 MB, so
2 terabytes could store around 5000 cd's.
If you would only have 24 bit 192 kHz albums, the drive would be full around 750 albums.
The difference between a normal harddisk and an SSD drive should be a lower noise, both
acoustically and electrically, for the SSD but also a sixfold price - around € 100
for the harddisk and around € 600 for the SSD.
I haven't tested the drives since I currently haven't all kinds of drives lying around.
Auralic states clearly that an internal harddisk should be ordered when bought new or added
by an official service point later on.
A USB drive would be another option but I used the share on my Intel NUC running Linux Mint.
I find that more versatile than a NAS, although this job could just as well have been taken
care of by a NAS and with less hassle.
After you have pointed the Altair towards your music - easily by using a browser - it
starts reading in the metadataa, followed up by indexing.
The Altair works like a charme.
I have used it predominantly as a streaming digital pre-amp, driven from the Lightning
DS app and alternatively Roon.
You can easily use both next to each other - although not at the same time, obviously.
If you do, the latest instruction will prevail.
Something to take into account is that when you switch from streaming to local DAC functions,
the unit more or less boots up again.
Switching back from local inputs to streaming needs to be done using the remote control
or the menu options using the rotary knob on the front.
Since the network functions are switched off , neither the Lightning DS controller nor
Roon will see the device.
The infrared remote uses the Philips RC5 codes for amplifiers.
That is something to keep in mind if you you use other equipment that uses that code too.
In my case both my Arcam surround receiver in the living room and the Marantz amp in
my Set 2 responded to the Auralic remote.
But that only plays a role if you want to use the Altair in combination with a
RC5 controlled amp or receiver.
In my set 2 I switched to using the Marantz as a power amp and then the Altair is a very
powerful pre-amp that could connect to all my equipment.
Let me state again clearly that - although I felt that I had to warn against the mentioned items,
the Altair is a pleasure to use.
In fact the most pleasant streamer/dac that visited me for a long time.
The Altair has four filter settings, which sounds great but to be honest I only really
like the fourth one, called Smooth.
Auralic stated that about 80% of their user like this filter best, so I am in good company.
It is the minimum phase filter that has no pre-echo.
The sound is more powerful that that of the Hugo
although the resolution in the mid range is somewhat less.
Auralic mentioned they will release an update soon that allegedly will have very good upsampling.
That might further improve the time resolution.The Altair comes very close to the Mytek Brooklin
although here again the time resolution in the mid range is lower and the Altair doesn't
support MQA, nor will it in the future.
It is remarkable how different DAC's sound different while all being convincing.
The Chord Hugo being smooth and very clean in the mid range, the Mytek Brooklyn being
more upfront but with a mid range very close to the Hugo and the Auralic Altair being a
streamer as well and the only really ergonomically well designed of the three, having a sound
close to the Mytek but being the second runner up
where time smearing in the mid range is concerned.
I would like to note that over time I have become extremely sensitive to the midrange
time smearing and it might be something you wouldn't even hear at all.
My point is that all three really make music when integrated in my set 1 - see the link
in the show notes for my reference sets.
Since you keep asking about headphone listening: I can't enjoy headphone listening so please
don't ask me for a judgement on the - powerful - headphone connection.
I am not the right person to judge this.
A Swiss army knife is often hailed for its versatility but having one for over 20 years
I know that the build quality is even more appreciable.
The Altair is just as versatile while the build quality - in every respect - is very high
The difference between the two products is that the knife is a nail breaker while the
Altair is a pleasure to use and it is a looker.
I am very curious what the announced upsampling filter update will bring.
For now it's a very good streaming DAC that comes very close to DAC's without the streaming
function at the same price.
Keep in mind that adding a networked audio adapter like the microRendu plus a proper
power supply will set you back another € 900.
Choices, choices.
But let me assure you that the Altair does what it should do: bring you lots of music
enjoyments.
And as far as future developments are concerned, if you want to stay informed, subscribe to
this channel, my newsletter or follow me on Twitter, Facebook or Google+.
See the show notes for the links.
If you have a question, post it below this video but please don't ask me for buying advise.
See my About Questions video to find out why.
If you liked this video, please consider supporting the channel through Patreon, see the link
in the show notes.
And don't forget to tell your friends on the web about it.
I am Hans Beekhuyzen, thank you for watching and see you in the next show or on theHBproject.com.
And whatever you do, enjoy the music.
-------------------------------------------
Satfinder - DUR line SF 4000 BT - Bluetooth Satellitenmessgerärt - Sat Meter - Duration: 2:13.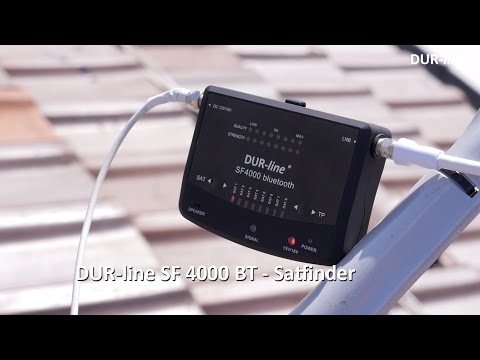 For more infomation >> Satfinder - DUR line SF 4000 BT - Bluetooth Satellitenmessgerärt - Sat Meter - Duration: 2:13.
 -------------------------------------------
Origami Bunny Face for Mister Rabbit 🐰 Easy Tutorial for your Easter Crafts projects - Duration: 10:11.
Hello Everyone!
Today I'm going to show you how to fold my new model, an origami rabbit.
In this video, I will show you how to fold the face.
And in a next video, I will also show you how to fold a body
So that you can create a Mister Rabbit or a Misses Rabbit.
To fold the face of the origami bunny
You need a square piece of paper, with a different color on each side.
And we'll start with the color on the bottom.
Then fold the square vertically.
Mark the fold.
And unfold.
Then bring the two edges to the center.
And keep them folded.
Next fold the two top corners down.
And we are going to bring the corners inside
And to do this, open the corner
Open the flap
Fold this fold again.
And invert this fold in the middle.
And when you close, you need to invert the last fold here.
And close.
Same thing on the other side.
Open the corner.
Open the flap.
Fold the first fold again.
Invert the fold in the middle.
And when you close, you need to invert the last one.
And we will do the same thing for the two bottom corners.
So fold them upwards.
Mark the fold.
And then put the corners inside.
So open the corner.
Open the flap.
Fold this again.
Invert the fold in the middle.
And invert the last fold when you close.
And the last corner.
Open, fold again.
Invert the fold.
And invert the last fold when you close.
And we are going to fold all the bottom tips upward.
All the layers.
Mark the fold well.
Then turn the model to the other side.
And we will take one layer of the top tip, and we will fold it down.
Then we are going to fold the ears,
starting from this point here,
and we are going to make this edge parallel to this edge.
When it is parallel, from this point, we can mark the fold.
And don't go all the way.
When you reach the bottom,
you need to flatten the fold, like this.
And we fold the ear in the middle.
And for the other ear, we are going to fold the ear so that it goes on top of the first ear.
So when it's exactly on top, you can mark the fold here.
And same thing, when you reach the bottom, you need to flatten the fold.
Like this.
Take your time to flatten the fold.
And then fold the ear in the middle.
Turn the model to the other side.
And now you need to fold this tip, only one of them, down.
So you need to make a fold at this level.
Now we are going to make the eyes of the bunny.
So take one tip and fold it like this.
Then fold the other tip at the same level.
And we want to show the white of the eyes.
To do this, just unfold a little bit.
And open the pocket, here.
And flatten it.
Then fold this again.
And now we have a white eye.
So we can do the same thing on the other side.
Unfold a little bit.
Open the pocket and flatten.
And then fold this again.
Now we are going to do the front teeth of the bunny.
So take this tip and fold it upwards.
And then open again.
And put your finger inside so that you can make a fold like this.
One one side.
And we will do the same thing on the other side.
And you can open again and open both flaps like this.
And flatten.
Then fold the two corners like this.
And we are going to open again.
And fold one layer down.
So this should go to the bottom.
And you can flatten the corners like this.
And once you have done that, you can just fold the layers again.
And if you want you can mark a separation between the two front teeth.
By folding a little bit again like this.
So this is our bunny head, and what I like to do is to open the eyes a little bit.
Just put your finger inside.
And our bunny face is complete!
I hope you like this origami rabbit.
It's a cute model that you can make for Easter.
And I will soon publish new videos to show you how to fold a body for your rabbit
so that you can make Mister Rabbit or Misses Rabbit
So please don't forget to subscribe to get notified.
If you fold this rabbit or another of my origami models, please send me pictures
So that I can show them on the origami.plus web site
and in my next videos.
I'm always very happy to read your comments
so please let me know what you think about this video.
And if you like it, please share it! :-)
Thank you very much, and Happy Folding!
-------------------------------------------
Volvo V50 1.6 D2 S/S R-Design Pro Edition Navigatie, Leer, Lmv 17 inch, Xenon - Duration: 1:02. For more infomation >> Volvo V50 1.6 D2 S/S R-Design Pro Edition Navigatie, Leer, Lmv 17 inch, Xenon - Duration: 1:02.
 -------------------------------------------
Audi A5 Sportback 1.8 TFSI S EDITION - Duration: 0:54. For more infomation >> Audi A5 Sportback 1.8 TFSI S EDITION - Duration: 0:54.
 -------------------------------------------
MINI Countryman 1.6 Cooper S ALL4 works Pano JCW Leder Navi Airco 74 KM nieuw !!!! - Duration: 1:05. For more infomation >> MINI Countryman 1.6 Cooper S ALL4 works Pano JCW Leder Navi Airco 74 KM nieuw !!!! - Duration: 1:05.
 -------------------------------------------
Kong Skull Island Trailer For more infomation >> Kong Skull Island Trailer-------------------------------------------
Un cookie ? : de toute façon, toutes les féministes ne sont pas d'accord entre elles - Duration: 2:20. For more infomation >> Un cookie ? : de toute façon, toutes les féministes ne sont pas d'accord entre elles - Duration: 2:20.
 -------------------------------------------
Un cookie ? : les féministes n'ont pas d'humour - Duration: 2:23. For more infomation >> Un cookie ? : les féministes n'ont pas d'humour - Duration: 2:23.
 -------------------------------------------
Un cookie ? : Vous DEVEZ porter plainte en cas d'agression sexuelle ou de viol - Duration: 2:55. For more infomation >> Un cookie ? : Vous DEVEZ porter plainte en cas d'agression sexuelle ou de viol - Duration: 2:55.
 -------------------------------------------
Un cookie ? : c'est contradictoire d'être féministes et d'aimer des trucs sexistes - Duration: 2:06. For more infomation >> Un cookie ? : c'est contradictoire d'être féministes et d'aimer des trucs sexistes - Duration: 2:06.
 -------------------------------------------
Kid Icarus: Uprising #03 - LES TÊTES D'HYDRA ! - Duration: 14:45. For more infomation >> Kid Icarus: Uprising #03 - LES TÊTES D'HYDRA ! - Duration: 14:45.
 -------------------------------------------
Les différents types d'immunité - Duration: 3:26. For more infomation >> Les différents types d'immunité - Duration: 3:26.
 -------------------------------------------
Volvo S40 2.0D momentum Lmv Airco - Duration: 1:06. For more infomation >> Volvo S40 2.0D momentum Lmv Airco - Duration: 1:06.
 -------------------------------------------
Volkswagen Caddy 1.6 D 75KW/102PK AUTOMAAT ( DSG 7 ) - Duration: 1:02. For more infomation >> Volkswagen Caddy 1.6 D 75KW/102PK AUTOMAAT ( DSG 7 ) - Duration: 1:02.
 -------------------------------------------
Un cookie ? : Le plus important, c'est que le message passe, osef si ça vient d'un homme - Duration: 2:51. For more infomation >> Un cookie ? : Le plus important, c'est que le message passe, osef si ça vient d'un homme - Duration: 2:51.
 -------------------------------------------
Mercedes-Benz GLE-Klasse GLE 250 d 4-Matic AMG Automaat - Duration: 1:03. For more infomation >> Mercedes-Benz GLE-Klasse GLE 250 d 4-Matic AMG Automaat - Duration: 1:03.
 -------------------------------------------
Toyota Avensis Wagon 2.0 D-4D LUNA BUSINESS Dealer Onderhouden! - Duration: 1:02. For more infomation >> Toyota Avensis Wagon 2.0 D-4D LUNA BUSINESS Dealer Onderhouden! - Duration: 1:02.
 -------------------------------------------
BMW X3 1.8d sDrive Executive AUTOMAAT - Duration: 1:01. For more infomation >> BMW X3 1.8d sDrive Executive AUTOMAAT - Duration: 1:01.
 -------------------------------------------
Jaguar XF 2.2D Premium Edition 164pk Aut, Full options [Netto Taxi Prijs ] - Duration: 0:59. For more infomation >> Jaguar XF 2.2D Premium Edition 164pk Aut, Full options [Netto Taxi Prijs ] - Duration: 0:59.
 -------------------------------------------
Un cookie ? : tone policing et sealioning - Duration: 2:34. For more infomation >> Un cookie ? : tone policing et sealioning - Duration: 2:34.
 -------------------------------------------
THE KRISTEN STEWART BIRTHDAY PROJECT 2017 - PLANNED PARENTHOOD! - Duration: 1:19.
WOMEN'S RIGHTS ARE HUMAN RIGHTS!
-------------------------------------------
Fate / Grand Order Servant Figure Avenger Jeanne d'Arque Horta - Duration: 7:01. For more infomation >> Fate / Grand Order Servant Figure Avenger Jeanne d'Arque Horta - Duration: 7:01.
 -------------------------------------------
Revue Estee Lauder - Yuthica - Avene - Toleriane - Duration: 8:21. For more infomation >> Revue Estee Lauder - Yuthica - Avene - Toleriane - Duration: 8:21.
 -------------------------------------------
chum - Duration: 0:07.
Hey.
That's pretty good!
-------------------------------------------
What Can I Do About Headwinds? | Ask GCN Anything About Cycling - Duration: 9:16.
- Coming around faster than Caleb Ewan
with a point to prove,
it's another edition of Ask GCN Anything,
where you get to do
exactly that.
And that's ask questions, not win world tour bunch sprints.
Now, first up we have this question
from Kieron Burgess in the comment section.
"I'm a fairly novice cyclist.
"I live in Brighton in the UK and commute
"to work along the sea front.
"What is the best way to beat the oncoming wind?
"Are aerodynamics the key?"
#TorqueBack
Well thanks very much
for getting in touch, Kieron,
and we certainly do sympathise.
Headwinds absolutely suck,
unless, of course, you're a little bit of a sadist.
Because, let's face it, nobody jumps on their bike
with the sole purpose of flogging themselves giddy
into a headwind.
And in fact will do
our utmost to avoid them at all costs.
But, as certain as night turns into day,
from time to time, quite frequently in fact,
we are going to face a headwind.
So the best thing to do
is use a few different sorts of technique.
'Cause we know you can't actually stop the wind,
but you can go a little bit quicker,
become more efficient,
and more importantly, you can stop the wind from breaking
your will and morale,
by watching this video.
- We said many times here on GCN
that the biggest thing holding you back
on flat roads, is your body position.
So, you want to get a flat back,
Get your elbows and your knees tucked in,
drop your head, and you'll find you can go much faster
for exactly the same power output.
- Next up we have this question from Andres Omana
in the comment section, who asks
"Hello GCN,"
Hello.
"I'm 20 years of age and last year I got decently fit
"by training an average of 18 hours a week,"
which is a fair bit.
"Sadly, I can't ride my bike now
"for more than five hours a week.
"Is there any way I can keep fit?
"And if not, how can I deal with the bad feeling
"of being dropped by the group that I used to lead?
"Thanks in advance, love your videos."
Well thanks Andres for getting
in touch with us.
But firstly, I have to say to you, don't give up.
It can be done
and I'm testament to that because I used to train
on limited hours around a full-time job
for the vast majority of my riding career.
So what you need to do is basically train harder
and smarter to make every single one
of those training hours count.
So you need to basically instil a sense of discipline,
order, get yourself into a routine,
and it should work.
And hopefully, if you watch this video,
it should set you off
in the right direction.
This is going back a little bit.
Just blow the dust out of it.
- It's a 90's relic right there.
- Yeah, well a typical week
would look something like this.
So on a Monday, essentially where normally would be
a recovery day for me, Tuesday would be one hour hard,
for example, with three, three-minute hill reps.
Time now for the rapid fire round.
First up is this from Matt Somethingorother,
great name by the way,
"Dan, are you cutting your hair
"or does it just grow slowly?"
Now I was hanging out with Dan over the last couple of days
and he actually told me
that he likes his new hairstyle and does shave it quite
regularly, so looks like we're gonna be stuck with that
new hairdo for a couple of months yet.
Antione Huguet asks, "if you have a chain that has rusted
"a bit, would letting it soak a couple of days in vinegar,
"or coke, be a good solution? #TorqueBack"
I think the simple answer to that
is no.
Next up, we have this from Graeme Crowther,
"When using an indoor trainer, how do you suggest
"tackling snot rockets?"
Great question Graeme.
I spent a lot of time on the indoor trainer,
do have issues with snot rockets,
but just have a big towel
and a mat.
So, big towel and a mat, use as combination
should sort out the snot rockets.
Sam Murray asks, "If you had no hills where you lived,
"why would you ever go somewhere were there are hills?"
That is quite an interesting question
'cause hills are pretty brutal
and not everybody likes climbing hills.
And some people
actually try to actively avoid hills,
but I guess the answer to that question is
because you want to ride on hills really, Sam.
Penultimately, Brian Stokes has asked,
"Ask GCN Anything, what about Haribo
"as training recovery fuel?"
Now, to answer this question,
if you search on the internet for footage
at the end of Kuurne-Brussels-Kuurne just the other day,
the race that Pete Sagan won, I think your answer
is just there.
He basically hoovered up half a packet
as given to him by a soigneur.
And, I was at the Tinkoff-Saxo training company
a couple years ago
with Alberto Contador, et. al.,
Peter Sagan was there.
They'd just came in off a 3 1/2, four hour,
pretty intense training ride
and the first thing they had
was a little plastic cup
of Haribo.
There's your answer.
Finally, this from Bruno Zub,
it's a quite timely question in fact,
"What are you guys going to do when the channel hits
"one million subscribers?
"It's getting very close."
Tell us about it, Bruno.
We know it's getting close.
Possibly in the next couple of months.
But, I'm gonna throw
the question back out to you.
What do you guy think we should do for our millionth
subscriber celebration?
Leave your comments down below.
Okay, Rapid Fire is done and dusted.
And next up we have this question from somebody called
defredius in the comment section.
Hopefully I'm pronouncing that name right.
"I am 74 kilogrammes in weight and thinking of switching
"to 25 millimetre tubeless tyres on my road bike.
"So, what sort of pressures should I be running?"
#TorqueBack
Well, defredius, you have actually come to the right person
because I'm around 74 kilogrammes in weight at the moment
and my preferred tyre width of choice
is 25 millimetre tyres.
So, generally speaking, in dry conditions I'll run
about 100 psi and in wet conditions about 85-90 psi.
Although I'm running
tyres with inner tubes.
I have actually used tubeless tyres and ran exactly
the same pressure.
Now, for me, that sort of tyre pressure on that sort
of width offers a comfortable ride,
plenty of grip on the corners,
and it's just not too harsh, either.
And rolling resistance is pretty good, so
it's for me, it's a do-all tyre.
Now, if you are new to the sport,
the whole issue of how much pressure to put in your tyres
can leave many, many people scratching their head
because there's so many different things to consider.
There's the type of road surface that you're riding on,
there's the weather conditions at the time,
there's the type of tyre and width of tyre
that you're using, and then also you've got to factor
in your body weight as well,
because that is quite important.
Now, to answer all of these questions,
and to give you a little bit of guidance on this very
thorny subject, watch this video
where Simon talks you through.
- Well now it's safe.
That is a very good place to start,
but it's so not the only thing to think about.
We also need to factor in the width of our tyres
and also our body weight as well,
because narrower tyres need higher pressures
than wider ones, and heavier riders
need higher pressures than lighter ones.
- Finally on this week's Ask GCN Anything, we have this
question from MusicStuffSome.
Great name.
#TorqueBack,
"I heard a few weeks ago someone mention that it was
"good for road riders to do some other sports
"so they don't develop osteoporosis
"from doing non-impact exercise.
"I ride my mountain bike about 50%
"of the time and road bike the other.
"Is mountain biking, with jumps, and pressing into corners
"for grip, and more explosive manoeuvres, classed
"as impact or non-impact and should I look at maybe
"getting back into running on the side to help
"maintain some bone density?"
- As you can say, that's a very, very interesting question,
which led me to the deep, dark depths of the internet
to try and find some answers for you.
I must stress, they are very general.
Now, it is a great question.
I think it's worth mentioning that most pro riders
in the modern era do other sports in the winter.
Many will jump on a different sort of bike,
so a mountain bike or a cross bike,
and many will head to the gym,
depending on the sort of rider they are.
But I think, pretty much every pro rider now
will go to the gym to do some core work
which they'll then bring through to the rest of the season.
And another trend that we've seen emerging over the last
few years is that riders, pro riders in particular,
going hiking and doing lots of walking,
but what we can't say is that they do that specifically
in relation to preventing the onset of osteoporosis.
It is a really complicated subject
with lots of impact factors, but again,
from what I've read, a good rule of thumb
is to throw in some intensity to your riding
and like you mentioned, riding on a mountain bike
or a cross bike, with the different dynamics involved,
can help replicate some sort of impact,
although there is a slight difference of course.
Now, all of this may help, and I stress may help,
combat the issue of low bone density.
Although what I can stress is that it's a subject
that I advise you to read up on because it is remarkably
interesting.
Now, a rider that does thing completely differently,
again, is Richie Porte.
Now check out it his approach to training.
Utterly unique.
- Yeah, I mean to be fair the season,
I use it more as a recovery, you know, after my
after an easy ride or whatever,
you know, I'll go to the pool and
do a little bit more on the kick board
or something like that.
- Thanks again for all of your questions.
We do read as many as we can, so do keep them coming,
using the hashtag #TorqueBack in the comment section
down below and on social media as well.
Now, if you haven't already subscribed to GCN,
you can do so by clicking on the globe.
Please tell your mates,
and we'll be one more subscriber click away
from a million!
Which is gonna be absolutely amazing.
Now, for some more cycling tips, specifically how to draught,
how 'bout clicking just down here.
And for my exploration into crank length
in the pro-peloton, click just down here.
Now it's time
for some fake tea drinking.
-------------------------------------------
SUPPLEMENTS EXPOSED HOW TO ENSURE YOU ARE GETTING ADEQUATE VITAMINS & MINERALS - Duration: 7:26.
SUPPLEMENTS EXPOSED HOW TO ENSURE YOU ARE GETTING ADEQUATE VITAMINS & MINERALS.
BY ALANNA KETLER.
Many of us know that we probably aren�t getting all of the vitamins and nutrients
we need to function at our best, and often we turn to supplements to make up for it,
assuming we can get almost all of the vitamins and minerals we need through the various pills
and powders we find in the drug store.
Unfortunately, that�s not entirely true.
There is a lot of misinformation out there about vitamin supplements, and while it may
be a hard truth to swallow, for the most part, you�d be better off without them.
Let me explain.
While many of the popular vitamin brands are advertised as having 100% of your daily vitamin
needs, this is only technically true.
These vitamins are generally synthesized from an isolated source, which means your body
has almost no idea what to do with them and just expels them through your urine, rendering
them effectively useless.
So even if you spend hundreds of dollars on supplements each month, if you aren�t eating
a healthy, balanced diet, then there is a good chance that your body is deficient in
many essential vitamins and minerals.
Why Is This a Problem?
Many supplement companies exploit people�s honest desire to do the right thing for themselves
and their families by buying vitamins, profiting off of selling them useless pills.
When buying synthetic vitamins, not only are you not getting access to the nutrients that
you think you are, you may actually be increasing, rather than decreasing, your risk of disease.
The most common synthetic compounds used in these supplements, in fact, are the vitamins
themselves, and the majority of the vitamins on store shelves and those used to fortify
foods, including �natural� foods, are synthetic.
Let�s take the very popular vitamin C, for example.
Many of us are aware that this vitamin can help us avoid getting sick and recover from
illness quickly, but this is one of the most commonly synthesized vitamins on the market.
Generally, artificial vitamin C will be listed on the label as �ascorbic acid.� It is
unlikely that manufacturers will be able to get more than 100mg of vitamin C from various
foods into a tablet, so if you see a supplement that says vitamin C 100mg, it�s more likely
to be from a natural source.
Where�s the Harm In Synthesized Vitamins?
One study showed serious side effects in adults who were taking 1,000mg of Vitamin C per day.
This dosage impaired their energy systems, depleted their endurance, and weakened the
mitochondria of their cells, which burn fat and sugar.
It also had significant effects on the antioxidant system, which is a key immune system regulator.
This study was performed on adults, so the effects on children would, presumably, be
worse.
With regards to the vitamins that you may think are top of the line and that come from
fruit and vegetable concentrates, well, here�s what Dr. Philip Maffetone had to say in a
paper he published called �Serious Dangers Of Synthetic And Unnatural Vitamins�:
Unfortunately, most fruit and vegetable concentrates used in dietary supplements are dried with
very high heat, destroying various nutrients.
They don�t supply much nutrient but are used in the supplement to make it appear natural,
while all the nutrients listed on the label come from synthetic or other unnatural additions.
These so-called �whole food� supplements containing fruit or vegetable concentrates
have to be �spiked� with synthetic vitamins and other unnatural nutrients in order to
list any appreciable amounts of nutrients.
Read the supplement facts panel carefully.
Vitamin B is a big one as well, as it is one of the more popular supplements.
If a vitamin B supplement is synthetic, it will most likely be listed as folic acid.
To avoid this, choose active B vitamins, which are sold under the following common names
:
Thiamine (B1): Thiamine pyrophosphate; Thiamine triphosphate
Riboflavin (B2): Riboflavin-5-phosphate; Flavin mononucleotide (FMN)
Niacin (B3): Nicotinamide (adenine dinucleotide)
Pantothenic acid (B5): Pantethine
Pyridoxine (B6): Pyridoxal-5-phosphate
Folic acid: Folinic acid; 5-methyl tetrahydrofolate
Cobalamin (B12): Methylcobalamin; Adenosylcobalamin
Choline: Phosphatydlcholine
So What Are Our Options?
If you are concerned you�re not getting adequate vitamins and minerals through diet
alone, then it may be a good idea to supplement.
But keep in mind that it may not be as difficult as you think to get what your body needs from
food alone.
Just one orange, for example, hits the recommended daily intake for vitamin C, and there are
loads of other foods that you might eat on a regular basis that contain vitamin C as
well.
If you are eating a lot of organic fruits and vegetables, then you are definitely on
the right track toward good health.
A good rule of thumb is to eat a colourful diet comprised of a wide variety of organic
fruits and vegetables, in season when possible.
If you still feel as though you need a supplement, it is definitely worth putting in some extensive
research.
When purchasing, you want to make sure that the supplement is unpasteurized and coming
from whole, organic foods.
Choose liquids or lozenges where possible.
Find a company that you can trust, and if necessary just call and ask them about their
supplements.
The more you know, the better.
Also, there are some vitamins that support each other and work well in the body together,
like vitamin D and calcium for example, magnesium and calcium, vitamin C and iron, etc.
You can find liquid multi-vitamins available that are coming entirely from plant based
ingredients.
Something like this may be the best option for overall vitamin intake, however some of
us are more deficient than others in certain vitamins.
To be sure, talk to your dietician or natural health care provider, either of whom can help
you determine what�s right for you and if there is anything specifically that you are
lacking.
-------------------------------------------
Ghost in the Shell For more infomation >> Ghost in the Shell-------------------------------------------
How to survive a long-haul flight - Duration: 9:24.
Happy Friday and welcome to watch the third episode of Aperitiivi (Apéritif)
Today we're having a taste of, yet again, Japanese treats
Let's see when we get to take you to somewhere else with these treats
But today we're having a popular drink in Japan, Cassis Orange
And then we have wasabi chips
That sounds pretty good
Let's pour some drinks
Oh, she got away
Cheers!
It's pretty tasty, not too sweet even when it sounds like it would be
It does have a wasabi flavor
Right?
Excellent chips
Today this combo succeeded
Today we're talking about long-haul flights
How you can prepare for long-haul flights and how you can make the journey a comfortable one
You should start the preparation for the day before departure
You should rest and consider the time difference and try to adjust your sleeping schedule a bit already
And I've noticed that it's good to do some excercise the day before
Take a walk in the forest or go jogging
It will make you fall asleep better and keep your feet in better shape for the duration of the flight
When you're packing your carry on items for the flight
Especially for a long-haul flight
I always have a small pouch where I have a sleeping mask, ear plugs, earphones, mobile phone charger and a USB extension cord
The extension cord helps when you want to use your mobile phone in the plane
These days on long-haul flights you can usually find a socket and a USB port on the media console or in the armrest
Yeah, that's true, you can charge your mobile devices
If there are no sockets, especially on budget airlines, it's good to have a powerbank with you
So you can charge your mobile device if you want to watch movies or listen to music etc.
You can download offline movies and videos from YouTube or Netflix, for example, on your mobile device
You can also download offline music from Spotify
So even though you don't have internet connection, you can use the offline content during the flight if you've downloaded them
10 hours, 12 hours, it's quite a long time if you don't have any entertainment with you
Before the flight and during the flight, it's important to drink enough of water
Flying dries your body, so for example try and have a gel made of chia seeds
Drink a lot of water
And have eye drops with you
They will help you survive the flight better
Yes, I have a habit of making a chia seed pudding, mixing chia seeds and water
You can mix it in the evening and put it in the fridge and eat it the next day before your flight
So it will keep your body hydrated and your stomach full
I carry a small pouch on flight where I have hygiene products
I can take the pouch with me when I use the bathroom
In the pouch I have a toothbrush and a small toothpaste, deodorant, wet tissues for your face or to freshen up your armpits, for example
And I have a lotion I can use for my hands and my face, eye drops and lipbalm
Your skin and lips will get dry in the plane
Especially when you have two long-haul flights it's good to have a set of clothes to change into
When we flew to New Zealand we had two 12 hour flights so it was nice to change clothes between them
Or at least do have a change of underwear so you can feel more fresh when beginning a new day at the destination
It's good to walk a bit in the plane when possible, for example once in an hour
Or if it's not possible to walk, at least do some feet exercise on your seat to keep your blood circulation going
Yes, and it's good to wear compression stockings, you will feel the difference
Also it's good not to wear too tight clothes since you will feel swollen and uncomfortable
For me, something that's helped me with the feeling of being swollen are the digestive enzymes
After your plane meal, after eating a lot of carbs or veggies, for example, you may get a lot of gas in your stomach
And then you'll feel even more swollen, it might be painful
For me, I've felt better with the digestive enzymes consumed together with the plane meal
Other pills I've found to be useful on flight is melatonin for getting sleep
It has helped me to fall asleep on the plane and to get a good night sleep
A few other tips besides the things you should pack with you
You should do the online check-in well in advance
Make sure to select the best seat possible for you
Its good to also choose your meal in advance
I prefer the vegetarian meal because they taste better and are usually seasoned better
It will make the flight more comfortable if the food is tasty
Yes, and I've noticed that on many flights the special meals are brought to you first
So you'll get to start your meal first when the others are still waiting
Yeah and then they'll also be served hot
One more thing
It might be cold in the plane
All of the airlines may not offer you blankets
So it's better to wear warm clothes than to freeze
Woolen socks are great
Take your shoes off and wear the woolen socks
I've also used slippers that they offer in hotel rooms in Japan, for example
I've taken the disposable slippers with me and used them in the plane
It's nice to walk around in the slippers
If you get hungry on a long-haul flight, they usually have snacks available
For example on Asian flights they may have cup noodles which you can have if you ask the flight attendant
Yeah, you can always ask for drinks or snacks
Many airlines will serve them
And remember to pack a pen on your carry on
No-one ever has that, but everyone will need it when you'll fill in the immigration form
Where you need to type in your information
So, take a pen with you
And if you forget it, you can ask the flight attendant
But be kind and return it, they're not pen dispensers
These were our tips for a long-haul flight
If you have more tips, comment below so we'll write them down and try them out
Have a nice weekend!
Bye!
-------------------------------------------
スト5_技一覧_いぶき_通常技_(字幕on) - Duration: 2:17. For more infomation >> スト5_技一覧_いぶき_通常技_(字幕on) - Duration: 2:17.
 -------------------------------------------
Auralic Altair - Duration: 13:35.Auralic made name with their Aries streamer that not only offered low jitter signals over
AES/EBU and SPDIF but also offered a very clean USB 2 Audio Class 2 signal to USB DAC's.
The Auralic Altair is not just a streamer but a DAC as well.
The Altair is housed in the rather tasteful cabinet that is used for other Auralic products as well -
though not the Aries.
As said, the Altair is a streaming DAC but you can also look at it as a digital pre-amp,
given the numerous inputs.
Never the less the front looks very clean with only one control on it.
This rotary encoder functions normally as a volume knob but when pressed, switches to
controlling the menu.
A green on black display shows the choices and when in playback shows the set volume,
a play/pause indicator and the Auralic name.
A small red LED lights up when the unit is switched on.
A 6.3 mm headphone jack is situated on the right.
The display can be dimmed or switched off all together.
Let's have a look at the back: There is a mains input with power switch and fuse.
You also see two antenna sockets for the tri-band Wifi.
Then we see the network connector, a USB A socket for storage devices, a USB A socket
to drive an external DAC, a USB B socket to use the Altair as a USB DAC, plus the normal
digital inputs: TOSlink, SPDIF and AES/EBU.
Other more virtual inputs are Bluetooth - using the lossy ATPX compression -
and Airplay that is limited to 48 kHz.
As a network renderer the Altair is also very versatile: Songcast, uPnP/DLNA, Tidal, Qobus
and internet radio, all using Auralic's own Lightning DS user interface.
There currently only is an iOS app but it runs smooth and fast enough not to irritate.
Alternatively you can use Roon or Roon Essentials since the Altair is also Roon Ready.
You can have the supplier build in a 2.5 inch hard disk or SSD and play from there too.
Installing the harddisk yourself is not allowed and will void warranty.
For outputs the Altair provides both asymmetrical outputs on RCA's and balanced outputs on XLR's.
The volume control changes the volume on both the line outputs plus the headphone output.
When we look inside, we see on the right the linear power supply that is preceded by a
Schaffner mains filter.
The middle section contains the usual interface chips, like the clearly visible XMOS.
More interesting is what's behind these chips: like the Aries the Altair is based
on the Auralic Tesla 'computer' that uses a 1 GHz quadcore ARM Cortex A9 processor with
1 GB DDR3 memory on board and 4 GB system storage.
This small computer is housed on a separate pcb that is connected to the main pcb using
an edge connector.
On the right of it there is a SATA and harddisk power socket for connecting the 2.5 inch harddisk
or SSD in the all metal cage between the pcb and the front.
The harddisk is mounted in rubber-like fixes to prevent acoustic noise.
Below the ribbon cable that connects to the front there is a Wifi and bluetooth radio pcb
that is connected to the two antenna sockets on the rear.
The d/a-conversion and analogue output stages are separated from the rest using a metal shield.
The ESS 9018K2M 32 bit stereo DAC chip is well respected and has not only a good sounding
digital volume control but also a jitter reducing provision and the option to use proprietary filtering.
As I have said before, the use of this very DAC chip on it's own is no guarantee for a good sound.
But Auralic has a reputation where jitter is concerned and that shows here.
Not only is there a roomy layout but there is a clear separation between the DAC and
the rest while the dual frequency Femto master clock oscillator is mounted very close to the DAC chip.
Of course a local voltage regulator provides a very clean voltage.
That all showed in measurement.
During measurements I wanted to repeat several measurements since the results were so 'clean'
I thought the Altair had muted.
The most remarkable was the linearity measurement.
I usually don't show measurements but this time I do.
This linearity measurement shows if all digital amplitude values are correctly converted to
the corresponding analogue voltages.
The yellow line shows the input-output relation.
So where the lines of minus 60 dB on the Y scale and minus 60 dB on the X scale meet,
there the yellow line should cross.
The same goes for any value on those scales.
To make things easier, the red line shows the deviation from the optimal.
At -110 dB the deviation is only 1.5 dB and at -120 dB it stil is only 5 dB's.
Very good figures that also show that the noise is very low for otherwise the noise
would have masked the test tone and values would have been higher at low levels.
Enough tech, let's go to the real world use.
Since the Altair functionally is a chameleon, you have to think about how to use it.
The most obvious choice is to use it with the Lightning DS software on an iPad.
Although an iPhone is also possible, the smaller screen is less convenient.
You simply download the Lightning DS app from the App store and start it up.
The Altair -and other Auralic streamers when present -will show up.
Simply select it and follow the instructions to point it towards your music.
Here again you should have planned ahead where to store the music.
It can be on the optional internal 2.5 inch harddisk or SSD.
Both are available to a maximum of 2 Terrabytes and it depends on what music at what sampling
rate and what file format is used how many albums can be stored.
Normal cd- quality encoded with FLAC or Apple Lossless would be around 400 MB, so
2 terabytes could store around 5000 cd's.
If you would only have 24 bit 192 kHz albums, the drive would be full around 750 albums.
The difference between a normal harddisk and an SSD drive should be a lower noise, both
acoustically and electrically, for the SSD but also a sixfold price - around € 100
for the harddisk and around € 600 for the SSD.
I haven't tested the drives since I currently haven't all kinds of drives lying around.
Auralic states clearly that an internal harddisk should be ordered when bought new or added
by an official service point later on.
A USB drive would be another option but I used the share on my Intel NUC running Linux Mint.
I find that more versatile than a NAS, although this job could just as well have been taken
care of by a NAS and with less hassle.
After you have pointed the Altair towards your music - easily by using a browser - it
starts reading in the metadataa, followed up by indexing.
The Altair works like a charme.
I have used it predominantly as a streaming digital pre-amp, driven from the Lightning
DS app and alternatively Roon.
You can easily use both next to each other - although not at the same time, obviously.
If you do, the latest instruction will prevail.
Something to take into account is that when you switch from streaming to local DAC functions,
the unit more or less boots up again.
Switching back from local inputs to streaming needs to be done using the remote control
or the menu options using the rotary knob on the front.
Since the network functions are switched off , neither the Lightning DS controller nor
Roon will see the device.
The infrared remote uses the Philips RC5 codes for amplifiers.
That is something to keep in mind if you you use other equipment that uses that code too.
In my case both my Arcam surround receiver in the living room and the Marantz amp in
my Set 2 responded to the Auralic remote.
But that only plays a role if you want to use the Altair in combination with a
RC5 controlled amp or receiver.
In my set 2 I switched to using the Marantz as a power amp and then the Altair is a very
powerful pre-amp that could connect to all my equipment.
Let me state again clearly that - although I felt that I had to warn against the mentioned items,
the Altair is a pleasure to use.
In fact the most pleasant streamer/dac that visited me for a long time.
The Altair has four filter settings, which sounds great but to be honest I only really
like the fourth one, called Smooth.
Auralic stated that about 80% of their user like this filter best, so I am in good company.
It is the minimum phase filter that has no pre-echo.
The sound is more powerful that that of the Hugo
although the resolution in the mid range is somewhat less.
Auralic mentioned they will release an update soon that allegedly will have very good upsampling.
That might further improve the time resolution.The Altair comes very close to the Mytek Brooklin
although here again the time resolution in the mid range is lower and the Altair doesn't
support MQA, nor will it in the future.
It is remarkable how different DAC's sound different while all being convincing.
The Chord Hugo being smooth and very clean in the mid range, the Mytek Brooklyn being
more upfront but with a mid range very close to the Hugo and the Auralic Altair being a
streamer as well and the only really ergonomically well designed of the three, having a sound
close to the Mytek but being the second runner up
where time smearing in the mid range is concerned.
I would like to note that over time I have become extremely sensitive to the midrange
time smearing and it might be something you wouldn't even hear at all.
My point is that all three really make music when integrated in my set 1 - see the link
in the show notes for my reference sets.
Since you keep asking about headphone listening: I can't enjoy headphone listening so please
don't ask me for a judgement on the - powerful - headphone connection.
I am not the right person to judge this.
A Swiss army knife is often hailed for its versatility but having one for over 20 years
I know that the build quality is even more appreciable.
The Altair is just as versatile while the build quality - in every respect - is very high
The difference between the two products is that the knife is a nail breaker while the
Altair is a pleasure to use and it is a looker.
I am very curious what the announced upsampling filter update will bring.
For now it's a very good streaming DAC that comes very close to DAC's without the streaming
function at the same price.
Keep in mind that adding a networked audio adapter like the microRendu plus a proper
power supply will set you back another € 900.
Choices, choices.
But let me assure you that the Altair does what it should do: bring you lots of music
enjoyments.
And as far as future developments are concerned, if you want to stay informed, subscribe to
this channel, my newsletter or follow me on Twitter, Facebook or Google+.
See the show notes for the links.
If you have a question, post it below this video but please don't ask me for buying advise.
See my About Questions video to find out why.
If you liked this video, please consider supporting the channel through Patreon, see the link
in the show notes.
And don't forget to tell your friends on the web about it.
I am Hans Beekhuyzen, thank you for watching and see you in the next show or on theHBproject.com.
And whatever you do, enjoy the music.
No comments:
Post a Comment